That first scratch on your car door is a personal affront. A ding from a shopping cart crushes your gut. You see it every morning, all you see is a bill in front of your eyes, $800, $1,200 and maybe even $2,000 from a body shop.
The bottom line is this: Most minor auto body damage is cosmetic. It does not impact the way your car drives, but it will destroy its resale value … and your pride. This is sexy for the auto repair industry, because they make a huge pile of money from your fear of screwing it up worse. You fear mismatched paint, orange peel texture, or a sanding scratch that ruins the clear.
Stop worrying. You do not have to own a five thousand dollar spray booth or have decades of experience. You need a system. DIY Auto Body Repair: Learn 7 Professional Steps to Fix Scratches, Dents and Paint Chips with Hand Tools and Patience The results will save 80% of the body shop cost and have a paint finish that passes the five-foot test (and even one foot test in many situations) by the end of this post.
Quick Answer
Can a beginner fix auto body damage at home? Yes. You can repair light scratches, small dents, and paint chips in 3-6 hours for $50-$150.
The 7 steps are:
- Wash & Dry
- Sand the damaged area
- Apply filler (if dented)
- Primer
- Base coat (color)
- Clear coat
- Polish & blend
You need: Sandpaper (400-3000 grit), rubbing compound, spray primer, color-matched spray paint, clear coat, microfiber towels, and patience.
Do not expect: Frame damage repair, large dent removal (over 4 inches), or collision structural fixes. That is for body shops.
Why It Matters
Why should you spend a Saturday sanding your car instead of paying a pro?
- Financial Freedom: A typical bumper scratch repair costs $500-$1500. DIY costs $50-$150. You save enough for a weekend trip.
- Resale Value Retention: A car with touched-up paint and no visible rust sells for 15-20% more than one with obvious flaws. Dealers use scratches to lowball you.
- Immediate Gratification: Body shops take 3-5 days. You can finish this in one afternoon.
- Preventing Rust: Deep scratches expose bare metal. Rust spreads like cancer. Fixing a scratch today saves you from cutting and welding metal next year.
- Skill Building: Once you learn DIY auto body repair, you stop fearing parking lots, gravel roads, or tight garages. You become the person friends call for help.
What You’ll Need
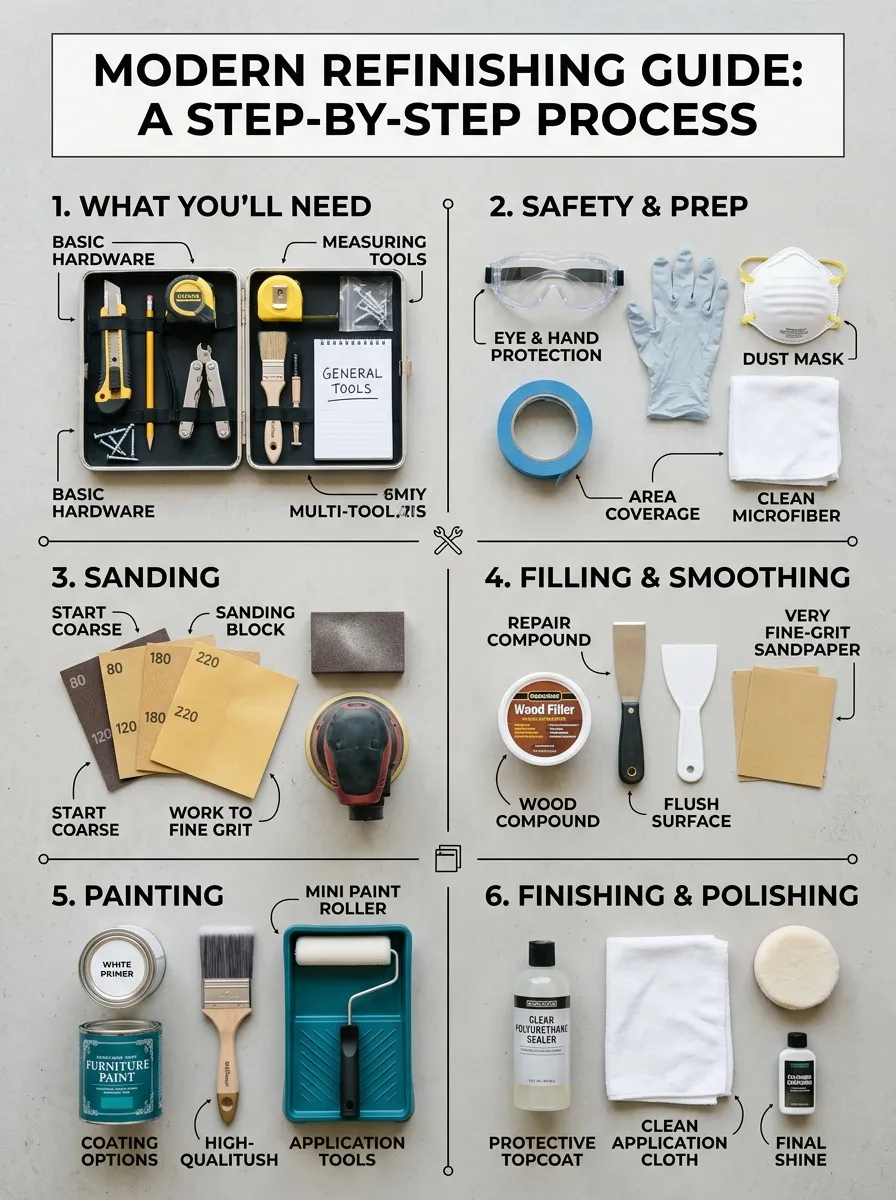
Do not run to the store yet. Read this list first. Most items are under $20.
Safety & Prep
- Nitrile Gloves (7 mil+): Paint and chemicals irritate skin.
- Respirator Mask (N95 or P100): Sanding dust and aerosol paint are dangerous to lungs.
- Painter’s Tape & Plastic Sheeting: Mask off headlights, windows, and trim.
Sanding
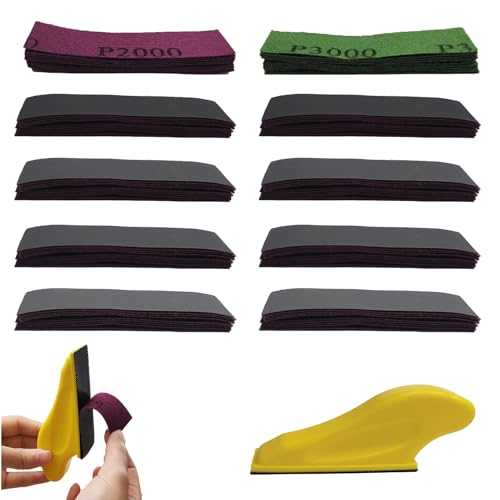
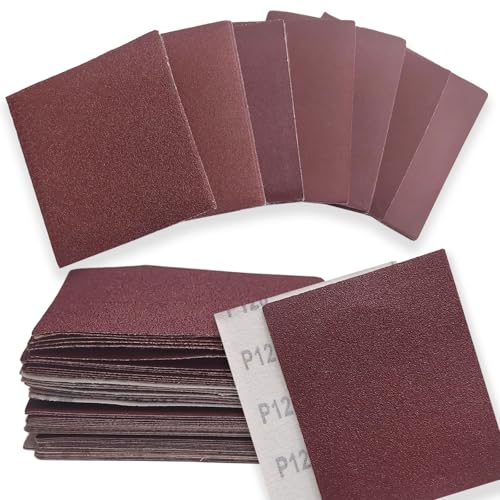
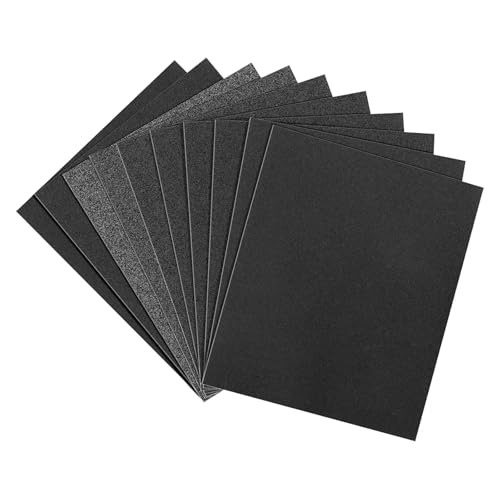
- Assorted Wet/Dry Sandpaper (400, 800, 1500, 2000, 3000 grit): Buy a variety pack. Wet sanding prevents clogging.
- Sanding Block (flexible rubber or foam): Your fingers create waves. A block creates flat surfaces.
Filling & Smoothing
- Body Filler (Bondo or comparable): For dents deeper than 1/8 inch.
- Hardener (usually included): Turns paste into rock.
- Plastic Spreader / Squeegee: Applies filler evenly.
Painting
- Primer Spray (High-build or self-etching): For bare plastic or metal.
- Color-Matched Base Coat: Find your paint code (driver’s door jamb or owner’s manual). Buy from AutomotiveTouchup or ScratchesHappen (affiliate).
- 2K Clear Coat (Spray can with activator button): 1K is weak. 2K is professional-grade, fuel-resistant, and hard.
Finishing & Polishing
- Rubbing Compound (heavy cut): Removes 2000-grit sanding marks.
- Polishing Compound (fine cut): Brings out gloss.
- Microfiber Towels (12-pack minimum): One for compound, one for polish, one for wax. Never mix.
- Dual Action Polisher (optional but recommended): A $50 Harbor Freight unit saves your arms.
Step-by-Step Guide
Let us fix that damage. I will assume you have a scratch that goes through the paint (you see white/gray primer or bare metal).
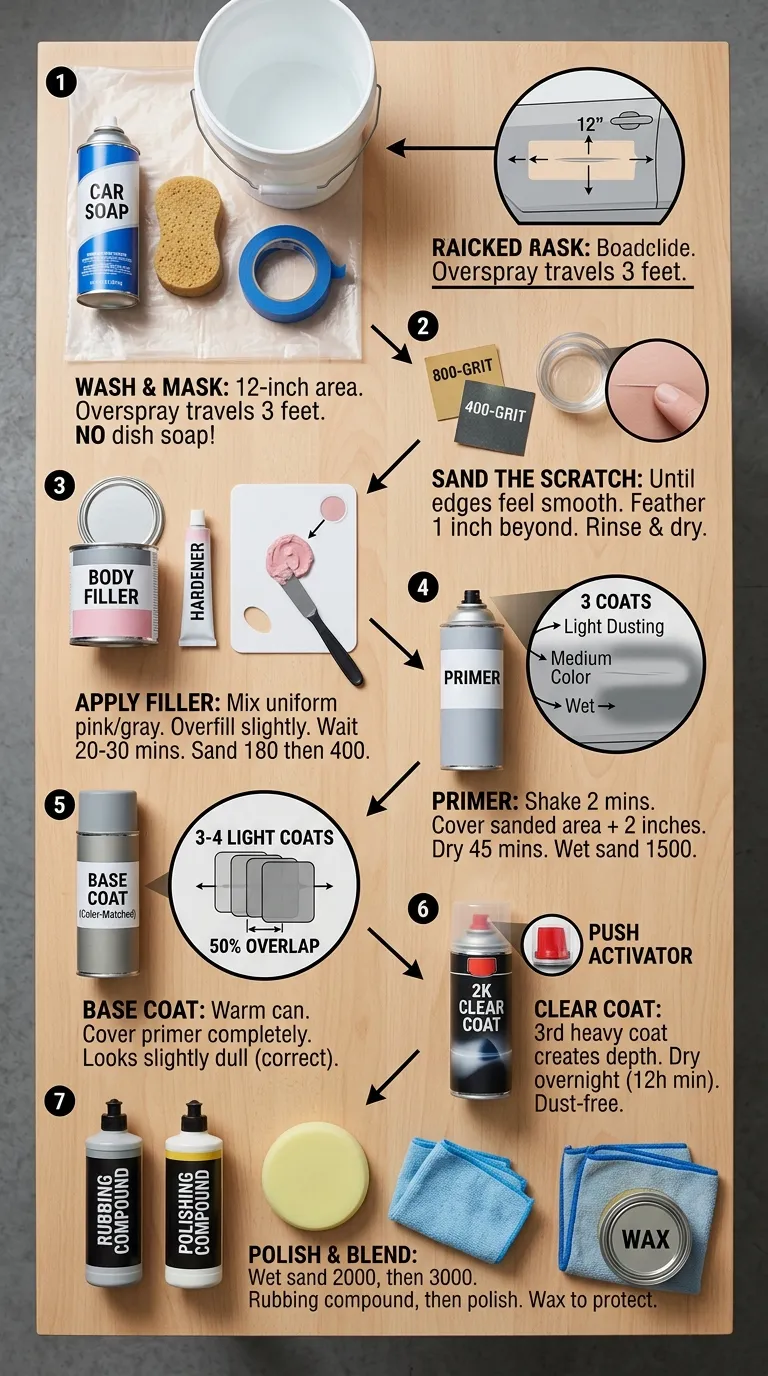
Step 1: Wash & Mask
Wash the entire panel with car soap. Not dish soap (it leaves residue). Dry completely. Use painter’s tape and plastic to mask a 12-inch area around the damage. Leave only the scratch exposed. Why? Overspray travels 3 feet.
Step 2: Sand the Scratch
- Start with 800-grit wet sandpaper dipped in water with a drop of soap.
- Sand the scratch until the edges feel smooth to your finger. You are removing loose paint.
- Switch to 400-grit only if the scratch is deep (feels like a canyon). Be careful – 400 grit removes material fast.
- Feather the edges: sand 1 inch beyond the scratch in every direction. The repair must blend, not be a hard line.
- Rinse. Dry. The area should look dull but smooth.
Step 3: Apply Filler
Skip to Step 4 if just a scratch.
- Mix a quarter-sized blob of filler with a 1-inch squeeze of hardener. Mix until uniform pink/gray.
- Spread hard and fast. Overfill slightly above the surface. Filler shrinks.
- Wait 20-30 minutes. Sand with 180-grit (dry), then 400-grit (wet) until perfectly flat. Run your hand over it. If you feel a bump, keep sanding.
Step 4: Primer
- Shake primer for 2 minutes. Spray a light “dusting” coat. Wait 5 minutes.
- Spray a medium “color” coat. Cover the sanded area plus 2 inches around.
- Wait 10 minutes. Spray a third “wet” coat (glossy appearance).
- Let primer dry for 45 minutes (or follow can instructions).
- Lightly wet sand with 1500-grit to remove orange peel. Do not sand through to bare metal.
Step 5: Base Coat
- Shake your color-matched can for 2 full minutes. Warm the can in hot water for 5 minutes (improves atomization).
- Spray 3-4 light coats, not one heavy coat. Each coat 50% overlap. Wait 8-10 minutes between coats.
- Your goal: Cover the primer completely. The color should look slightly dull (not glossy). That is correct.
- Let base coat dry for 30 minutes before clear coat.
Step 6: Clear Coat
- If using 2K clear, push the bottom activator button. You have 48 hours to use the can.
- Spray 2 medium-wet coats. Wait 10 minutes between.
- Spray a 3rd heavy coat (almost running, but not dripping). This creates depth.
- Let dry overnight (12 hours minimum) in a dust-free garage. Do not touch.
Step 7: Polish & Blend
- Wet sand the clear coat with 2000-grit, then 3000-grit if you have orange peel (bumpy texture).
- Apply rubbing compound on a foam pad. Buff by hand or machine until high gloss returns.
- Switch to polishing compound for final shine.
- Wax the entire panel to protect and blend the edges.
Cost Breakdown
Here is the honest financial reality. Body shop vs. DIY.
| Item | Body Shop Cost | DIY Cost (One-Time) | DIY Cost (If you have basic tools) |
|---|---|---|---|
| Scratch repair (small) | $300 – $600 | $50 – $80 | $25 – $40 |
| Dent + Scratch (bumper) | $600 – $1200 | $100 – $150 | $60 – $90 |
| Full panel repaint (door) | $1000 – $2000 | $120 – $200 | $80 – $120 |
| Total Average | $1200 | $110 | $70 |
Explanation:
- The body shop charges labor ($100-$200/hour), paint mixing ($50-$100), and facility fees.
- DIY costs are mostly consumables (sandpaper, compound) and paint.
- You will buy sandpaper (1 pack lasts 5 jobs). Clear coat (1 can per panel). Color paint (1 can per panel).
- Pro tip: Buy a “scratch repair kit” ($30) for your first job. It includes everything except color paint.
Before and After
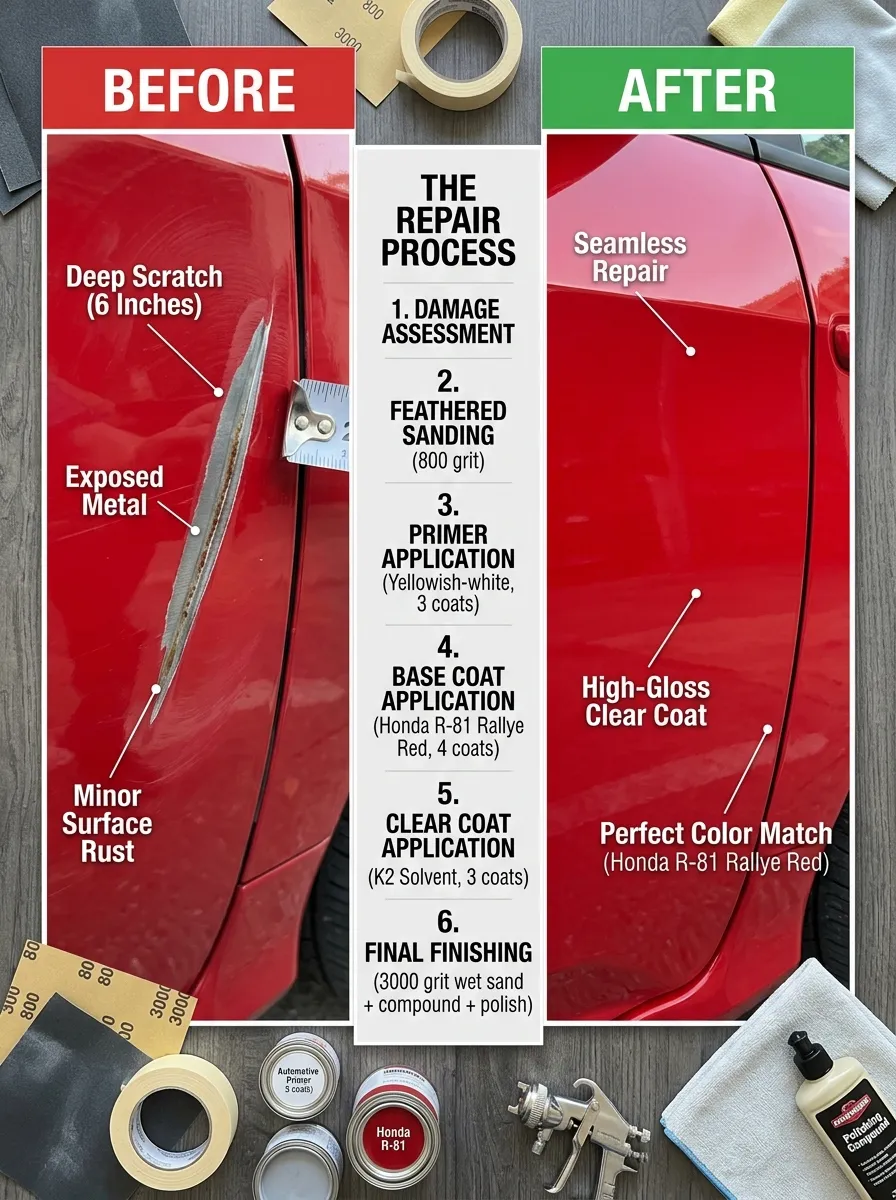
EXAMPLE: 2018 Honda Civic Red — Deep scratch on the door of the driver’s side 6 inches long. Metal to the metal (silver/grey showing)
Photo before (Caption): A white rough baroque across the doorknob Surrounding paint is glossy red. The scratch catches your fingernail. Moisture is hitting the metal, so you see a little of surface rust forming (reddish brown dots).
Process in Use: Step 2 (sand with 800 grit), Step 4 (drying the lower parts using Primer – repeated for a total of 3 coats), Step 5 (applying base coat, each coat being light and this is done over a yellowish white primer following Honda R-81 Rallye Red shade where applied for a total of four coats), Step 6 (Final stage solvent three coats K2 clear),Step7(3000 granton wet sand + compound + polish clamopup testGarnierLong))
After (Description): Glossy door throughout. You can not see it in sunlight. You are under a flashlight spread to 45-degrees, so you generally see a 2-inch patch with slightly softer reflection (the blend zone). No color mismatch. No rust. Doing the 5-foot test, makes sense because that is a very easy pass to get Owner’s spouse: “Which door did you repair?
How does this work: Feathered sanding (step 2) and blended clear coat application (step 7) removes the hard edge between the paint and base. The human eye sees contrast. Get rid of the scratch contrastnow.
Product Recommendations
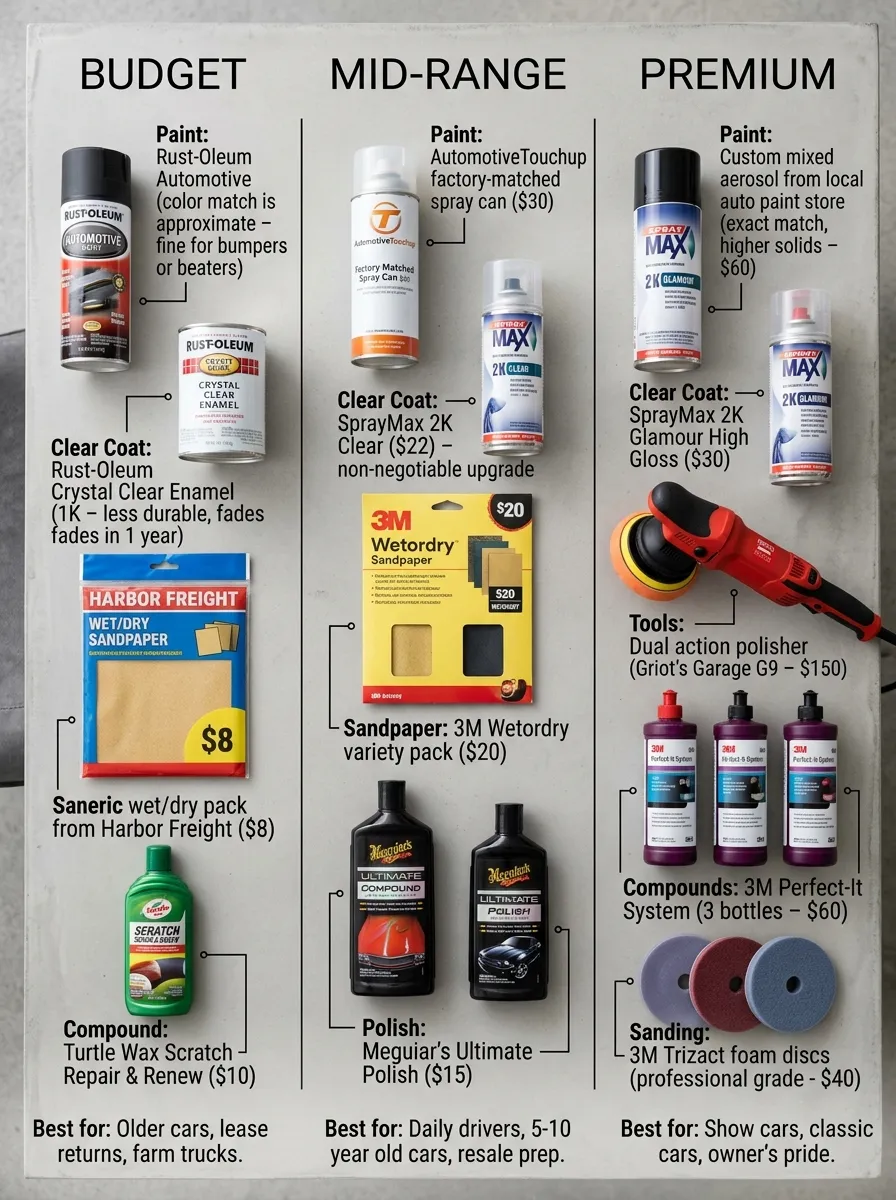
Budget
- Paint: Rust-Oleum Automotive (color match is approximate – fine for bumpers or beaters)
- Clear Coat: Rust-Oleum Crystal Clear Enamel (1K – less durable, fades in 1 year)
- Sandpaper: Generic wet/dry pack from Harbor Freight ($8)
- Compound: Turtle Wax Scratch Repair & Renew ($10)
- Best for: Older cars, lease returns, farm trucks.
Mid-Range
- Paint: AutomotiveTouchup factory-matched spray can ($30)
- Clear Coat: SprayMax 2K Clear ($22) – non-negotiable upgrade
- Sandpaper: 3M Wetordry variety pack ($20)
- Compound: Meguiar’s Ultimate Compound ($15)
- Polish: Meguiar’s Ultimate Polish ($15)
- Best for: Daily drivers, 5-10 year old cars, resale prep.
Premium
- Paint: Custom mixed aerosol from local auto paint store (exact match, higher solids – $60)
- Clear Coat: SprayMax 2K Glamour High Gloss ($30)
- Tools: Dual action polisher (Griot’s Garage G9 – $150)
- Compounds: 3M Perfect-It System (3 bottles – $60)
- Sanding: 3M Trizact foam discs (professional grade – $40)
- Best for: Show cars, classic cars, owner’s pride.
Comparison Section
Scratch Repair Pen vs Spray Can Repair
| Feature | Scratch Repair Pen | Spray Can (DIY Auto Body Repair) |
|---|---|---|
| Cost | $15 – $25 | $50 – $100 |
| Time | 10 minutes | 3 hours |
| Skill needed | None | Moderate |
| Result quality | Obvious touch-up (3-foot rule) | Near invisible (1-foot rule) |
| Durability | 6-12 months (fades) | 3-5 years (like factory) |
| Best for | Small chips (<1/8 inch), lease return quick fix | Scratches over 1 inch, bare metal, resale value |
Winner: Spray can repair if you care about the car. Pen only for emergency or black plastic bumpers where color match doesn’t matter.
Troubleshooting
| Problem | Likely Cause | Fix |
|---|---|---|
| Paint is dripping / runs | Sprayed too heavy or too close | Let dry hard (48 hours). Sand with 1000-grit flat. Respray light coats. |
| Color doesn’t match | Wrong paint code or faded original | Check door jamb sticker. Blend into adjacent panel. Or live with it (bumper only). |
| Orange peel (bumpy texture) | Clear coat applied dry or cold | Wet sand with 2000 → 3000 grit. Polish with heavy compound. |
| Clear coat peeling after 1 month | Used 1K clear or didn’t sand primer | Sand entire area down to primer. Respray with 2K clear only. |
| New scratch appears after sanding | You sanded too hard or used dirty sandpaper | Start over. Wash car. Use fresh 1500-grit with lots of soap water. |
| White haze / blush in clear | Humidity too high (over 70%) or cold | Buff with compound. If not fixed, sand and respray on a dry, 70°F day. |
Time Required and Difficulty Level
| Repair Type | Time | Difficulty (1-10) |
|---|---|---|
| Small scratch (clear coat only) | 1 hour | 2 (easy) |
| Deep scratch to metal (no dent) | 3 hours | 4 (medium) |
| Small dent + scratch | 5 hours | 6 (medium-hard) |
| Bumper scuff (plastic) | 2 hours | 3 (easy-medium) |
| Full panel respray | 6 hours + drying | 7 (hard for first timer) |
Best first project: A small scratch on a bumper (plastic doesn’t rust) or a used fender from a junkyard. Practice first.
Pro Tips
Do
- Do warm your spray cans in hot tap water for 5 minutes. Paint flows smoother.
- Do practice on cardboard or an old hood before touching your car.
- Do wait the full drying time between coats. Impatience causes wrinkles.
- Do use a sanding block. Your fingers create waves.
- Do buy 2K clear coat. It is the single biggest upgrade for $22.
Don’t
- Don’t spray in direct sunlight. Paint dries before leveling (orange peel).
- Don’t spray below 65°F or above 85°F. Check the can.
- Don’t skip primer on bare metal. Rust will return in weeks.
- Don’t use cheap masking tape (blue painter’s tape only). Hardware tape leaves residue.
- Don’t wax before painting. Wax = fisheyes (crater-like holes). Degrease only.
Best Picks
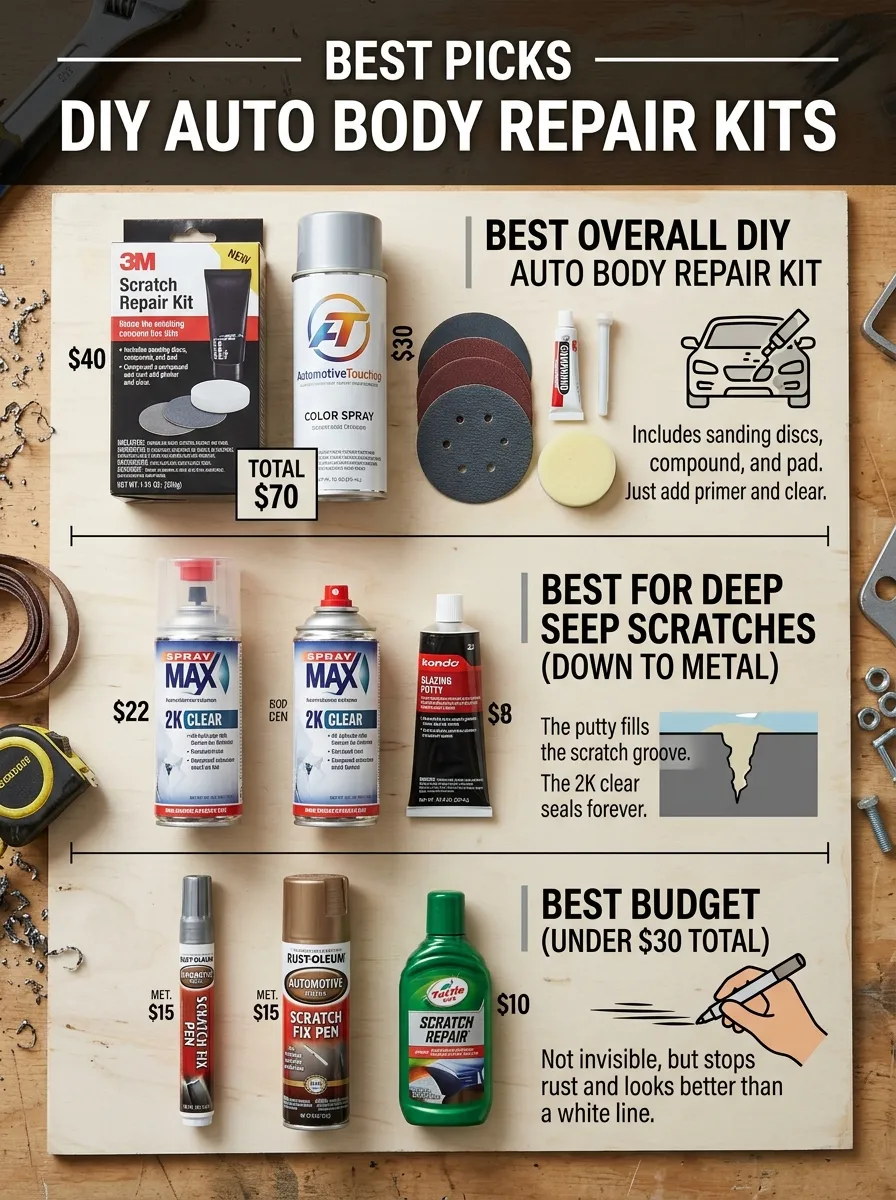
- Best Overall DIY Auto Body Repair Kit: 3M Scratch Repair Kit ($40) + AutomotiveTouchup color spray ($30). Total $70. Includes sanding discs, compound, and pad. Just add primer and clear.
- Best for Deep Scratches (Down to Metal): SprayMax 2K Clear ($22) + Bondo Glazing Putty ($8). The putty fills the scratch groove. The 2K clear seals forever.
- Best Budget (Under $30 Total): Rust-Oleum Automotive Scratch Fix Pen ($15) + Turtle Wax Scratch Repair ($10). Not invisible, but stops rust and looks better than a white line.
Use Cases
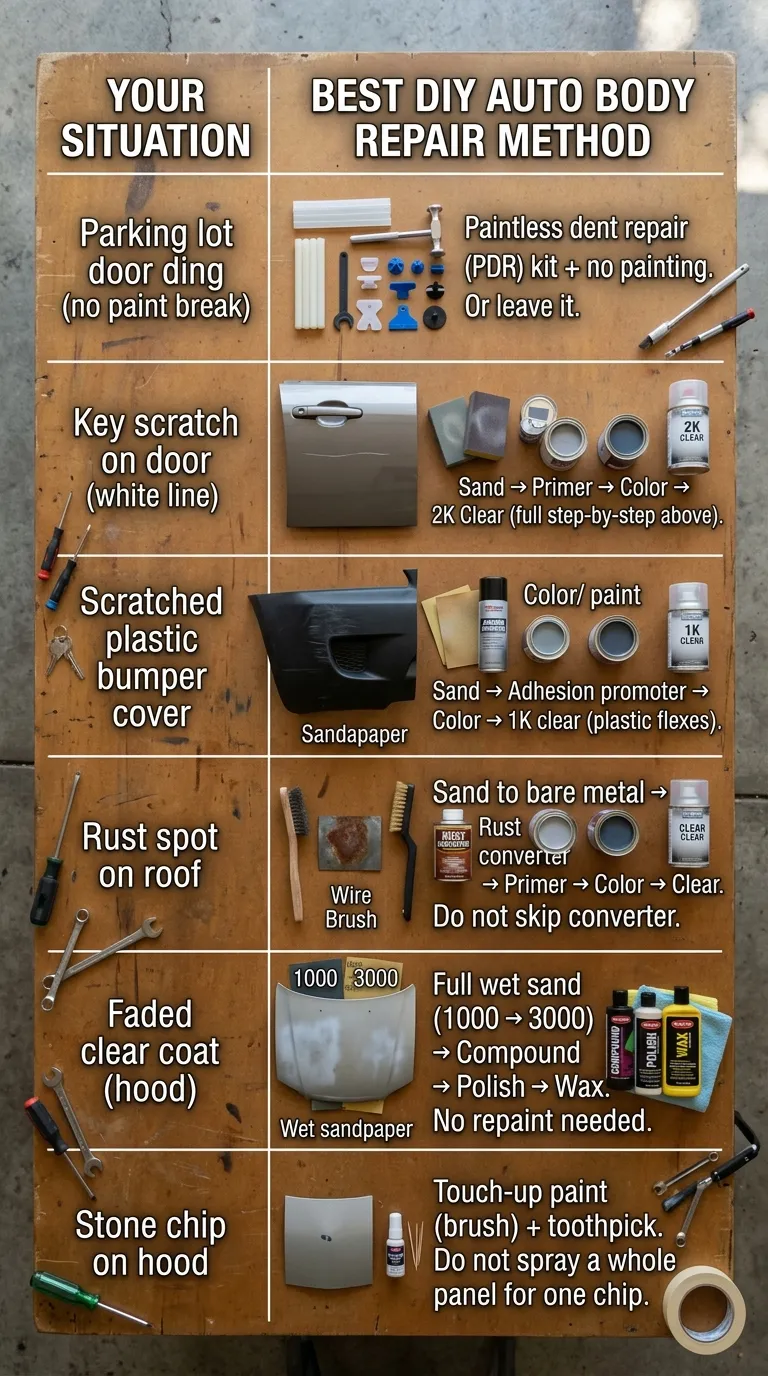
| Your Situation | Best DIY Auto Body Repair Method |
|---|---|
| Parking lot door ding (no paint break) | Paintless dent repair (PDR) kit + no painting. Or leave it. |
| Key scratch on door (white line) | Sand → Primer → Color → 2K Clear (full step-by-step above). |
| Scratched plastic bumper cover | Sand → Adhesion promoter → Color → 1K clear (plastic flexes). |
| Rust spot on roof | Sand to bare metal → Rust converter → Primer → Color → Clear. Do not skip converter. |
| Faded clear coat (hood) | Full wet sand (1000 → 3000) → Compound → Polish → Wax. No repaint needed. |
| Stone chip on hood | Touch-up paint (brush) + toothpick. Do not spray a whole panel for one chip. |
Common Mistakes to Avoid
- Not sanding enough. Most beginners stop too early. The repair area should feel completely smooth with no lip.
- Spraying heavy coats. Heavy = runs. Light coats = smooth. Trust the process.
- Ignoring temperature and humidity. Painting at 60°F creates blushing (white haze). Painting at 90°F creates dry spray (dusty texture).
- Using 1K clear coat outside. 1K is enamel. Gasoline, bird droppings, and UV kill it in months. 2K is urethane – permanent.
- Forgetting to blend. A perfect color match with a hard tape line looks worse than the scratch. Always blend clear coat into the panel.
- Sanding through the clear. When wet sanding, stop frequently. Wipe dry. Look for shiny spots (low areas). Only sand the high orange peel.
FAQs
1. Can I fix a dent in my car without a professional?
But, yes small dents, dings and creases can be repaired at home with Paintless Dent removal (PDR) tools, suction Cups or glue pullers.
2. How do I remove a small dent without damaging the paint?
The safest method is Paintless Dent Removal, where you gently push the dent out from behind or pull it using glue tabs. This keeps the original paint intact.
3. What is the best DIY filler for a car dent?
After pulling the dent, low spots can be filled using automotive body filler like Bondo or similar putty, which hardens and allows you to smooth the surface.
4. How do I sand auto body filler properly?
Always use a sanding block instead of your hands to keep the surface perfectly flat, and begin with 80-grit sandpaper, working up to 180-to-320-grit.
5. How do I get an exact paint match for my car?
Locate your car’s paint code (usually in the door jamb, under the hood, or glove box) and use it to buy the exact matching automotive paint for a seamless repair.
6. How do I paint a car panel without a spray booth?
A booth is the best case, but you can go through high quality spray cans or mini HVLP sprayer in much safer and ventilated area ( garage for example ) with 2K primer & sealer to prevent rust.
7. What is the “clear coat” and how do I fix it?
The clear coat is the transparent protective layer over your paint. To fix it, sand the damaged area, apply new clear coat, then buff and blend it for a smooth finish.
8. How do I fix deep paint scratches?
Deep scratches need more steps: fill if necessary, sand the area, apply touch-up paint in thin layers, add clear coat, and finish with wet sanding to blend everything smoothly.
9. Can I repair rust myself?
Yes, small rust spots can be handled at home. Remove the rust down to bare metal, apply a rust converter, then use filler and primer before repainting.
10. How long should I wait to wax new paint?
Wait at least 30 days (or up to 60 days in colder weather) before waxing to allow the paint to fully cure.
11. How do I fix a dent in a bumper?
For plastic bumpers, gently heating the area with a heat gun and pushing the dent out from behind is a common and effective technique.
12. What are the most essential DIY auto body tools?
A basic toolkit includes a dual-action sander, sanding blocks, suction cup or glue puller, body filler, sandpapers of various grits, a filler spreader, primer, paint, and clear coat.
Final Thought
Even at DIY auto body repair, it is not about being a professional painter It is all about the courage to attempt. Your initial scratch repair will not be a perfect one. You will see the blend line. It looks like a fleck of dust in the clear. Then you’ll drive the car, park it under the sun and realize nobody else notices thwse blemishes. All they see is a car that looks like it is cared for.
All expert bodyman learned on a rusty fender and spray can. You have this guide, a checklist of sorts and the knowledge that $50 in this investment will save you $500. All you need to keep your car from bouncing against itself is a Saturday and the guts to sand.
Avoid Body Shop Cost for insignificant Damage You are better than that. Now go fix your car.
Leave a Reply