We’ve all been there. You’re sitting in your car, and sunlight lands on the dashboard exactly right, lighting up a layer of dust you didn’t even know was there. You smell last week’s coffee, feel the filth on the steering wheel and spot sand molded into the floor mats. Suddenly your car is starting to seem more like a sanctuary and less like a mobile storage unit.
Dirty car interiors aren’t just an aesthetic issue, they’re a hygiene and financial one. Ingrained dirt acts like sandpaper, abrasive against the fabric and leather. Spills become permanent stains, and lingering smells make every ride miserable. But before you open your wallet to a pro detailer, understand this: with the proper knowledge and how-tos, you can do 90% of what they do at a fraction of the cost. Now is the time to hit them with professional-level car interior detailing tips, all available in this guide!
Quick Answer
Interior car detailing involves deep cleaning and protecting every surface inside your vehicle. The core process is:
- Declutter: Remove trash, personal items, and floor mats.
- Vacuum: Use attachments to clean carpets, seats, and every crevice.
- Clean: Apply dedicated cleaners to surfaces (vinyl, plastic, leather, glass).
- Scrub: Agitate dirt in carpets and upholstery with brushes.
- Protect: Apply conditioners to leather and UV protectants to dashboards.
- Finishing: Clean glass and deodorize.
Why It Matters (Benefits)
Investing time in interior detailing pays dividends beyond just a pretty car .
- Health & Hygiene: Carpets and vents harbor allergens, bacteria, and mold. Deep cleaning removes these, improving the air quality you breathe .
- Protects Your Investment: UV rays crack dashboards and dry out leather. Dirt grinds down carpet fibers. Regular detailing can help prevent aging and also help keep your car’s resale value.
- Driving Pleasure: A clean, fresh-smelling cabin reduces stress and makes every commute more enjoyable .
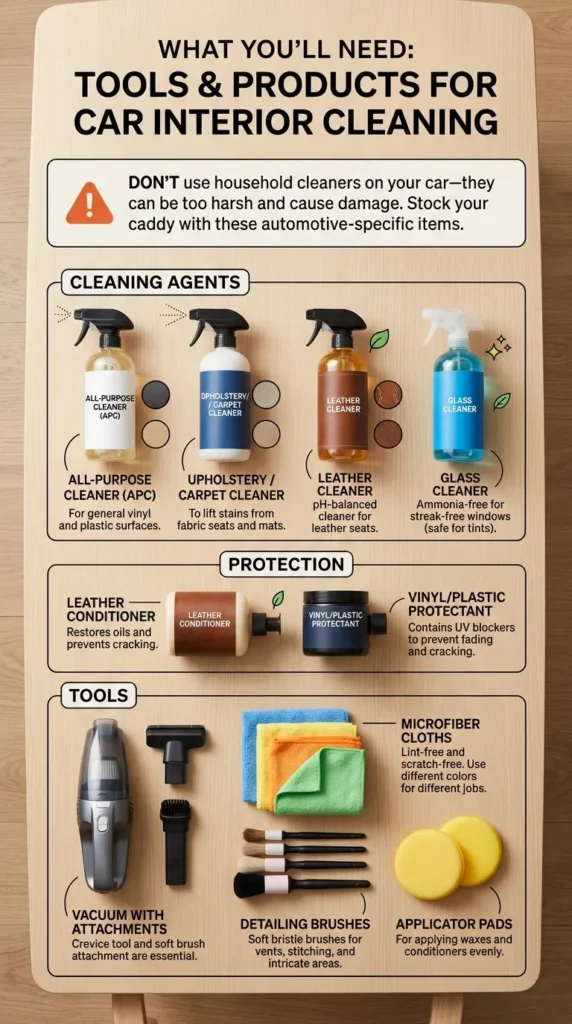
What You’ll Need (Tools & Products)
Don’t use household cleaners on your car—they can be too harsh and cause damage . Stock your caddy with these automotive-specific items.
| Category | Product Type | Purpose |
|---|---|---|
| Cleaning Agents | All-Purpose Cleaner (APC) | For general vinyl and plastic surfaces . |
| Upholstery / Carpet Cleaner | To lift stains from fabric seats and mats . | |
| Leather Cleaner | pH-balanced cleaner for leather seats . | |
| Glass Cleaner | Ammonia-free for streak-free windows (safe for tints) . | |
| Protection | Leather Conditioner | Restores oils and prevents cracking . |
| Vinyl/Plastic Protectant | Contains UV blockers to prevent fading and cracking . | |
| Tools | Vacuum with attachments | Crevice tool and soft brush attachment are essential . |
| Microfiber Cloths | Lint-free and scratch-free. Use different colors for different jobs . | |
| Detailing Brushes | Soft bristle brushes for vents, stitching, and intricate areas . | |
| Applicator Pads | For applying waxes and conditioners evenly . |
Step-by-Step Guide: How to Detail Like a Pro
Follow this systematic approach for the best results, working from the top down so dirt falls to the floor, which you clean last .
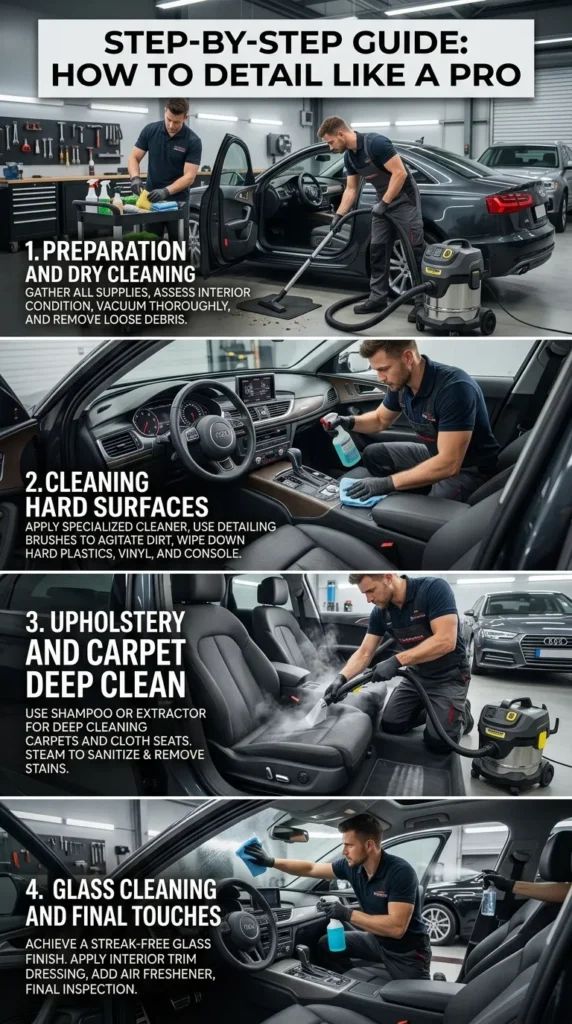
1. Preparation and Dry Cleaning
Park in the shade to prevent cleaning products from drying too fast and leaving residue . Remove everything: floor mats, trash, phone chargers, and personal items from the glovebox and compartments.
- Pre-vacuuming: Use a soft brush to loosen dirt from carpets and upholstery before you vacuum. This makes the vacuum more effective .
- Vacuuming: Using a soft brush attachment, rather than one that can snag the fabric, start with the headliner. Slide the seats forward and backward to get at places which are otherwise hidden. Then you will want to use the crevice tool along seat rails, under the center console and around the seatbelt anchors.
2. Cleaning Hard Surfaces (Dash, Console, Door Panels)
- Wipe Down: Apply your all-purpose cleaner or interior detailer to a microfiber cloth, not the surface directly (to avoid overspray on windshields and electronics). Clean the dashboard, steering wheel, door panels and center console.
- Agitate: Use a soft detailing brush to work the cleaner into textured surfaces and stubborn grime on door pockets and cupholders.
- Clean Vents: Clean Air Vents: Use detailing brush or compressed air to clean dust from your air vents. For serious cleaning, wrap a microfiber cloth around a thin knife or ruler to get between the vent fins.
3. Upholstery and Carpet Deep Clean
- Seats (Fabric): Vacuum first. Apply upholstery cleaner to the fabric, then agitate gently with a soft-bristled brush. Dirt can then be wiped away with a clean damp microfiber cloth. Do not over wet to avoid mold.
- Seats (Leather): Use a dedicated leather cleaner. Use a cloth or applicator pad, then wipe down the seats. Do not saturate the leather. Immediately follow up with a leather conditioner to maintain its suppleness.
- Carpets and Mats: For rubber mats, scrub with soap and water; rinse. Use a separate carpet cleaner for carpets. Spray, scrub with a brush to loosen stains, then blot with a towel. Wet/dry vacuums or extractors are best for tough stains.
4. Glass Cleaning and Final Touches
- Interior Glass: Use ammonia-free glass cleaner and a dedicated microfiber cloth for cleaning glass (or a lint-free cloth). Horizontally on the inside, vertically on the outside. It helps you determine what side a streak lands on.
- Apply Protectant: Use UV protectant for your dashboard and door panels to make them shine, and avoid sun damage. Apply occasionally to avoid a greasy appearance or slippery steering wheel.
- Deodorize: As a final step, use an odor eliminator or simply place a charcoal-based odor absorber under the seat to neutralize smells .
Cost Breakdown
Is it cheaper to DIY or go pro? Let’s break it down. A professional detail saves labor but costs more, while DIY requires an upfront investment that pays off over time .
| Service Type | Cost Range | What’s Included | Pros & Cons |
|---|---|---|---|
| Professional Basic Detail | $75 – $150 | Vacuum, window clean, dash wipe-down. | Pro: Quick, convenient. Con: May not include deep stain removal. |
| Professional Full Detail | $150 – $300+ | Shampoo carpets, leather conditioning, deep clean of all surfaces, odor removal. | Pro: Deep clean, handles tough stains. Con: Expensive, you have to leave your car. |
| DIY Starter Kit | ~$100 – $150 | Bucket, soaps, microfiber towels, interior cleaners, applicators. | Pro: One-time cost, supplies last for 5-10 details. Con: Requires physical effort and time. |
| DIY Per Session Cost | ~$10 – $20 | Cost of products used amortized over several details. | Pro: Cheapest long-term option. Con: Learning curve for techniques. |
Before and After: What to Expect
A proper interior detail is transformative. Don’t just clean; document your work!
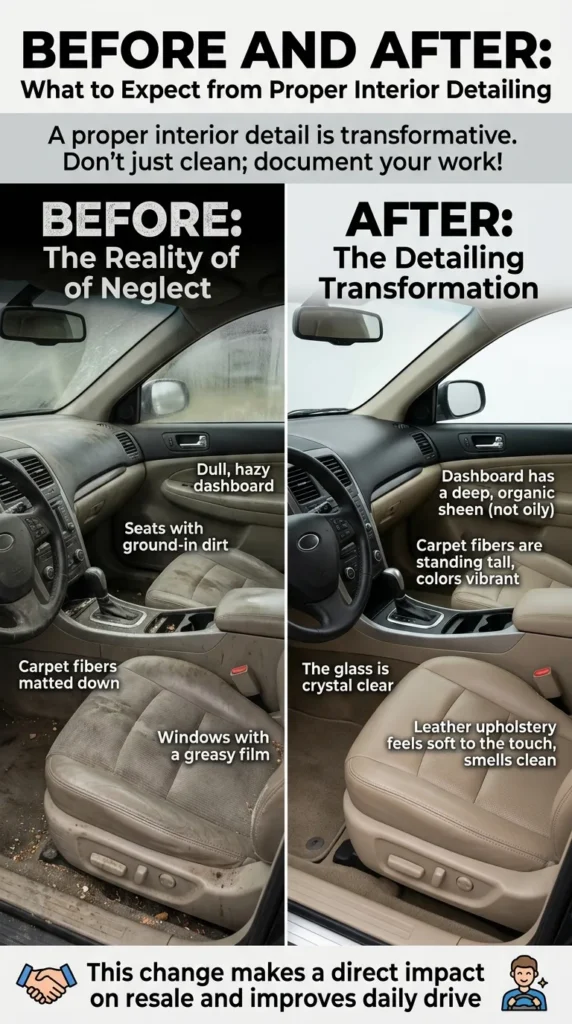
- Before: You might notice a dull, hazy dashboard, seats with ground-in dirt, carpet fibers matted down, and windows with a greasy film. The air might smell stale.
- After: The dashboard has a deep, organic sheen (not oily). Carpet fibers are standing tall, colors vibrant. Leather upholstery feels soft to the touch, smells clean. The glass is crystal clear, and the cabin smells good. This change makes a direct impact on resale and improves daily drive.
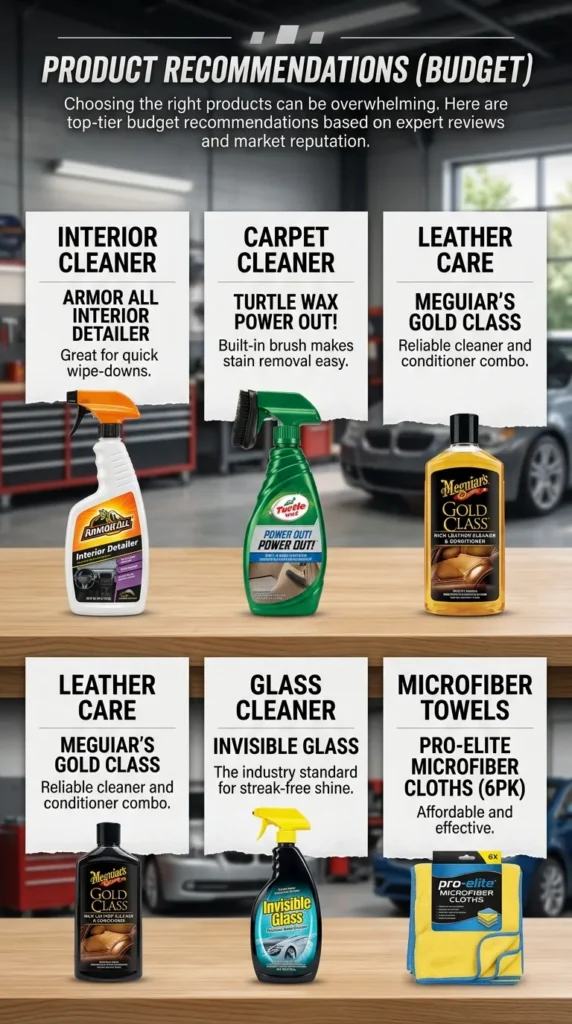
Product Recommendations (Budget)
Choosing the right products can be overwhelming. Here are top-tier recommendations based on expert reviews and market reputation .
| Category | Budget-Friendly | Mid-Range / Best Value | Premium / Professional |
|---|---|---|---|
| Interior Cleaner | Armor All Interior Detailer – Great for quick wipe-downs . | Chemical Guys InnerClean – pH balanced, great scent, works on all surfaces . | Gtechniq IWC – High-performance, anti-static properties. |
| Carpet Cleaner | Turtle Wax Power Out! – Built-in brush makes stain removal easy . | Bissell Spot Clean – A small machine for extracting deep dirt. | Folex Carpet Cleaner – Professional-grade, removes stains instantly. |
| Leather Care | Meguiar’s Gold Class – Reliable cleaner and conditioner combo. | Chemical Guys Leather Cleaner & Conditioner Kit – Complete system for deep cleaning and feeding leather . | Leather Honey – All-natural, non-toxic cleaner and conditioner . |
| Glass Cleaner | Invisible Glass – The industry standard for streak-free shine . | Stoner Invisible Glass (same as budget, it’s that good). | Gtechniq G6 Perfect Glass – Anti-static, repels dust. |
| Microfiber Towels | Pro-elite Microfiber Cloths (6pk) – Affordable and effective . | The Rag Company Eagle Edgeless – Super soft, high-quality edgeless towels. | Autofiber – Ultra-premium weaves for zero scratching. |


Comparison Section: Cleaner Wipes vs. Spray & Towel
When it comes to applying interior dressings and cleaners, you have a choice: convenience or control.
Option A: Protectant / Cleaner Wipes (e.g., Armor All Extreme Shield Wipes)
- Process: Pop open the canister, pull out a pre-saturated wipe, and rub it on the surface.
- Pros: Incredibly convenient for quick touch-ups. No need for extra towels. Disposable and great for travel .
- Cons: You have less control over how much product is applied, which can lead to a greasy film. Less economical per use than a spray bottle.
Option B: Spray Cleaner + Microfiber Towel (e.g., Meguiar’s Ultimate Protectant)
- Process: Spray the product onto a towel or surface, wipe, and then buff with a dry side of the towel.
- Pros: Maximum control. You can achieve a perfect matte or satin finish without greasy streaks. More economical and versatile as you can use the towel for other tasks .
- Cons: Requires carrying more tools (spray bottle and a good towel). Slightly more time-consuming.
Winner: For a full detail, Spray + Towel is always the better choice for a professional finish. Wipes are best for maintenance between details.
Troubleshooting: Problem
Even with the best intentions, things can go wrong. Here’s how to fix common issues .
| Problem | Likely Cause | The Fix |
|---|---|---|
| Streaky/Greasy Dashboard | Using too much protectant or not buffing enough. | Dampen a clean microfiber with water or a 50/50 water/rubbing alcohol mix and wipe the surface to remove excess. |
| Spots on Headliner | Using too much liquid, causing the adhesive to fail or dirt to wick. | Gently blot (don’t rub) with an upholstery cleaner. Use minimal moisture and let it air dry completely. |
| White Residue on Leather | Using a low-quality conditioner or not working it in fully. | Wipe the area with a damp cloth. Reapply a high-quality conditioner in a thin layer and buff thoroughly. |
| Perfume/Fog Smell | Dirty cabin air filter or bacteria in the AC system. | Replace the cabin air filter. Run the AC on max with recirculation off and spray a disinfectant into the exterior air intake. |
| Hard-to-Reach Gunk in Cupholders | Sticky spills that are out of sight. | Remove the cupholder insert if possible. If not, spray with APC, let it sit, and agitate with a detailing brush. Wipe clean. |
Time Required & Difficulty Level
- Time Required: 2 to 5 hours. (That will vary by how big your vehicle is, how dirty it is and your experience level. An average size vehicle that just needs a light clean may take 2 hours, whereas a larger SUV with kids mess and pet hair could take 5+.
- Difficulty Level: Beginner to Intermediate. The process is straightforward but a perfect finish takes time and care. The largest “risk” is using the wrong product on a sensitive surface (like cleaning leather with an aggressive cleaner), but if you stick cautiously to this guide, you’ll be golden.
Pro Tips
Do:
- Work in the shade: Prevents products from drying too fast and causing streaks .
- Use the “Two-Towel Method”: One towel for applying cleaner/product, and a separate, dry towel for buffing it off to a streak-free shine.
- Test in a hidden spot: Always test any new cleaner on an inconspicuous area (like under a seat) to check for colorfastness or damage .
Don’t:
- Don’t use household glass cleaners on tinted windows; the ammonia will discolor and peel the tint .
- Don’t soak electronics. Be very careful around the infotainment screen, buttons, and controls. Spray your towel, not the dash .
- Don’t eat in your car! This is the number one rule to maintain a clean interior. If you must, avoid crumbs and spills at all costs .
Best Picks
If you could only buy three things to vastly improve your interior, start here:
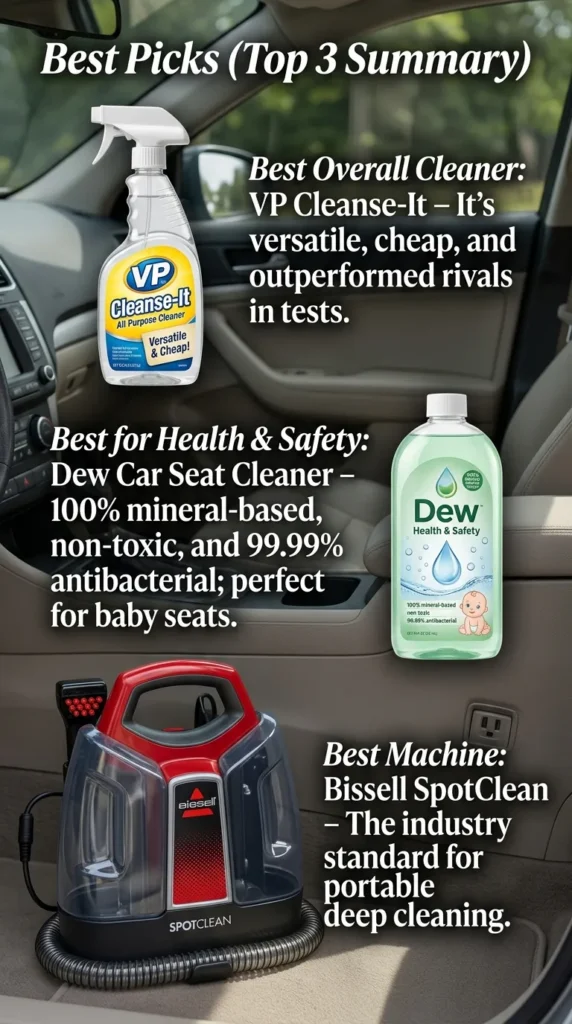
- Best All-Rounder Cleaner: Chemical Guys InnerClean. It’s safe for almost every surface (except glass and carpets), smells great, and leaves a natural finish .
- Best Value Tool: Pro-elite Microfiber Cloths. You simply cannot detail without a stack of these. They are reusable, scratch-free, and essential for every step .
- Best Stain Remover: Turtle Wax Power Out! The built-in brush makes it perfect for tackling dirty floor mats and carpet spots quickly and effectively .
Use Cases
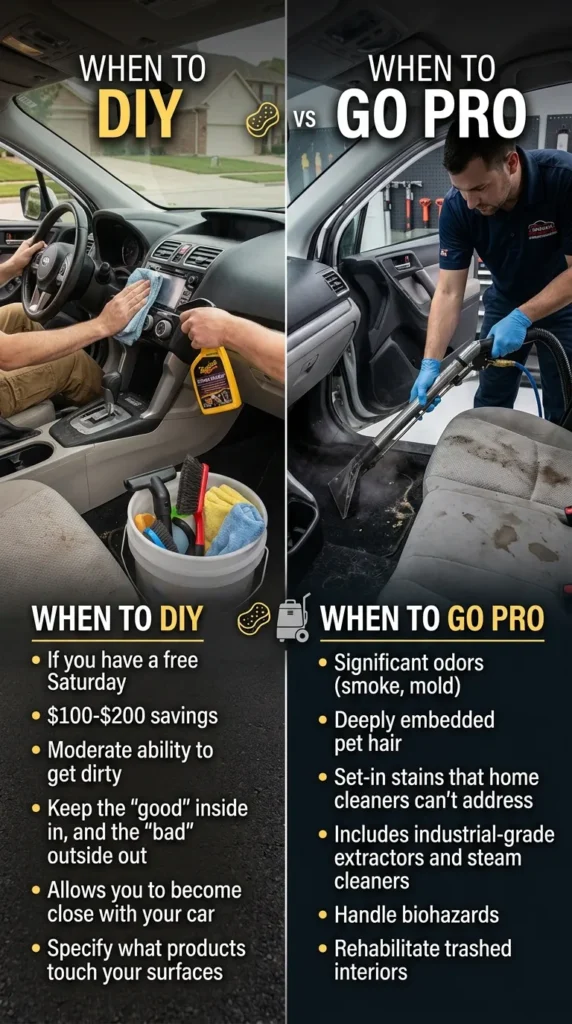
- When to DIY: Which, if you have free Saturday, some moderate ability to get dirty and $100-$200 that you’d like to save. DIY is also better to keep the “good” inside in, and the “bad” outside out. It allows you to become close with your car and specify what products touch your surfaces.
- When to Go Pro:If there are significant odors in your car (like smoke or mold), deeply embedded pet hair, or set-in stains that your home vacuum and cleaner can’t address. Including industrial-grade extractors, steam cleaners and the know-how to handle biohazards and rehabilitate trashed interiors.
Common Mistakes to Avoid
- Using Dish Soap on Interiors: It’s too harsh and will strip away built-in protectants, leaving surfaces dry and prone to cracking .
- Rubbing a Stain: Always blot a spill. Rubbing spreads the liquid and grinds it deeper into the carpet fibers.
- Forgetting the Door Jambs: Open your doors and clean the painted sills and rubber seals. It’s a small detail that makes a huge difference when you open the door.
- Applying Dressing to a Dirty Surface: Sealants and conditioners lock in dirt if applied over grime. The surface must be perfectly clean first .
Safety Notes
- Electrical Components: You shouldn’t spray cleaners directly on or near the steering wheel controls, infotainment screen and gear shifters. It is capable of liquefying, meaning that extra humidity can enter and create electrical shorts.
- Ventilation: Make sure to work in an area with plenty of ventilation. Concentrated cleaners can have strong fumes. Take care if steam cleaning — there may be hot surfaces or risk of steam burns.
- Pedal Area: Never apply a glossy protectant to the floor mats or the rubber of your foot pedals. This can make them slippery and extremely dangerous while driving.
FAQ
1. How often should I fully detail my car’s interior?
For most drivers, a full deep clean (shampooing, conditioning) is recommended every 4 to 6 months. Maintenance vacuuming and wiping should be done weekly or bi-weekly .
2. Can I use the same cleaner on leather and plastic?
While all-purpose cleaners exist, it’s best to use a dedicated leather cleaner on leather. Leather has specific pH needs and requires conditioning afterward, which plastic doesn’t .
3. What’s the best way to get rid of cigarette smoke smell?
Deep cleaning alone might not be enough. You need to replace the cabin air filter, clean all fabrics (including the headliner) with an enzyme cleaner, and use an ozone generator or a professional odor bomb .
4. How do I get pet hair out of my car carpet?
A pumice stone or a rubber squeegee works wonders. Run it over the carpet, and the friction will gather the hair into clumps that you can easily vacuum up.
5. Is it safe to clean a car’s touchscreen?
Yes, but carefully. Use a barely damp (with water) or dry microfiber cloth. Never spray liquid directly on the screen. Avoid window cleaners or harsh chemicals that can strip the anti-glare coating .
6. How do I clean car seats with built-in airbags?
Use a gentle cleaner and a damp cloth. Avoid saturating the seat, and never use protectants or conditioners that could clog the perforations where the airbag deploys.
7. What causes the foggy film on the inside of my windshield?
It’s a combination of off-gassing from the plastics in your dashboard (plasticizers) and the residue from your own breath and skin. A good cleaning with a dedicated glass cleaner solves this.
8. Can baking soda remove car odors?
Yes. Sprinkle baking soda on carpets and fabric seats, let it sit for a few hours (or overnight), and then vacuum it up thoroughly. It’s a great natural deodorizer .
9. Do I need to condition vinyl if it says “no maintenance”?
Yes. While modern vinyl is durable, UV rays will eventually dry it out. A conditioner with UV blockers will prolong its life and keep it looking new.
10. What’s the number one tip for maintaining a clean interior?
Clean spills immediately. The moment something spills, blot it up. Dried-on stains are exponentially harder to remove than fresh ones .
Final Thought
Vacuuming the inside of your car is a form of vehicular maintenance that’s frequently mundane, yet impactful. It turns your daily commute from a chore into a experience. At first glance, the task might seem overwhelming, but by following these realistic steps armed with the proper car interior detailing tips and products can make this achieveable for any vehicle owner! Not only will you save some money and protect your investment, you’ll get that deep sense of pride every time you open that door and step into a fresh clean comfortable cabin. So, get your supplies together, clear out a couple of hours and love your car like it deserves.
Leave a Reply