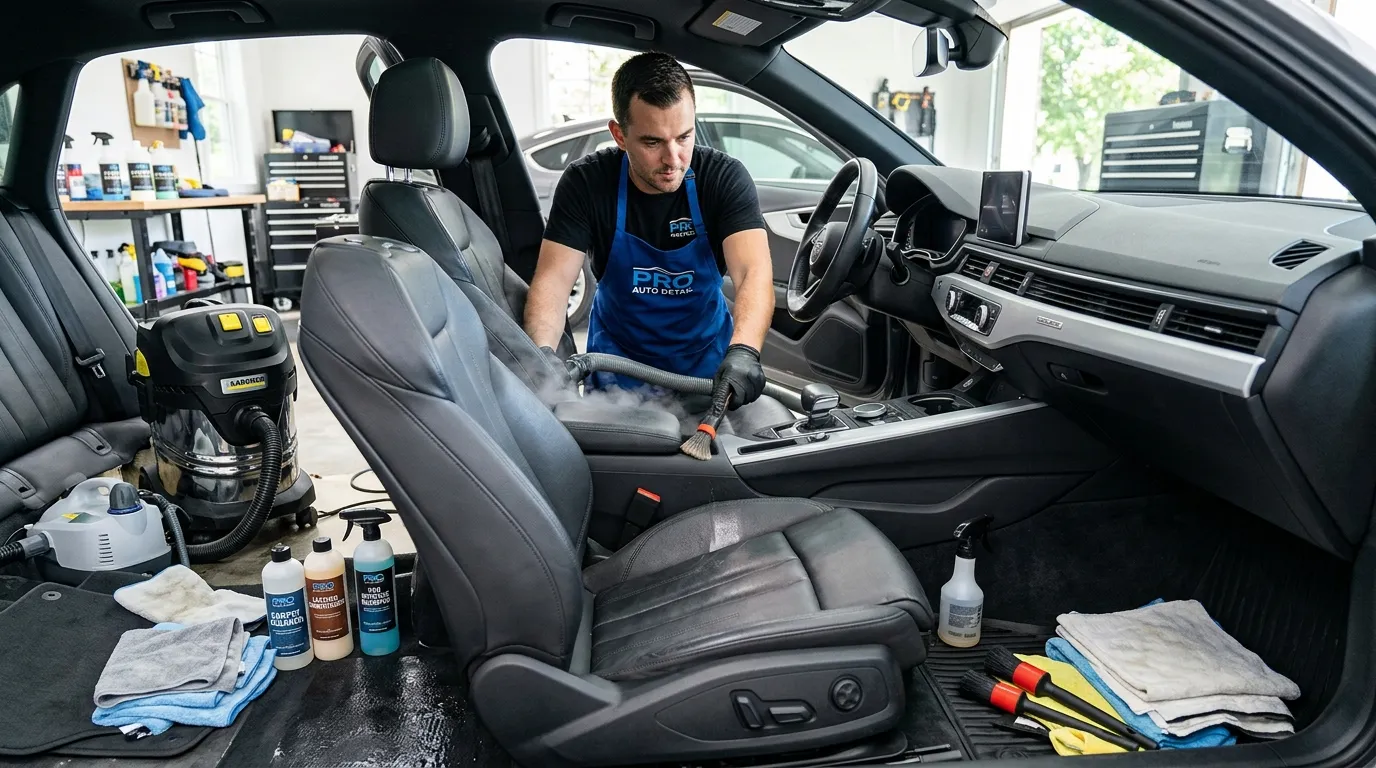
Let’s be real when was the last time you actually felt your car was clean inside? Not just clean, like you dusted off the dashboard, but clean as in the carpets don’t have crushed goldfish embedded in them, that the seats aren’t sheltering a layer of dog hair and that the air doesn’t smell like something from last week’s takeout? For many of us, the inside of our car is a black hole for clutter, crumbs and grime. We spend hours at a time in our vehicles, whether commuting, shuttling kids or running errands, which means their interiors often get dirty — but they’re not clean until the dirt is embarrassing.
The trouble is, a dirty interior isn’t simply an eyesore. Accumulated bacteria, allergens and stains can really compromise the quality of air and speed up the wear-and-tear on your upholstery, which will bring down your vehicle’s resale value. A quick wipe down with a rag isn’t going to do it: You need a deep clean.
You won’t just get a “how to” clean (in this ultimate guide). We’ll show you step by step how to sanitize, restore and protect every surface inside your vehicle with a professional-grade process. So whether you’re preparing for a road trip or looking to maximize the trade-in value of your ride, we promise that by the time this article is over, you’ll know how to get an interior as good as new without breaking the bank at the detail shop.
Quick Answer
To deep clean a car interior:
- Remove all trash, personal items, and floor mats.
- Vacuum thoroughly, including under seats and in crevices.
- Clean surfaces (dash, console, doors) with an appropriate cleaner.
- Scrub fabric seats and carpets with an upholstery cleaner.
- Condition leather seats to prevent cracking.
- Clean glass inside and out for a streak-free finish.
- Deodorize to eliminate lingering smells.
Total Time: 2–4 hours | Difficulty: Easy to Moderate | Cost: $30–$100 (DIY) / $150–$300 (Professional).
Why It Matters
Deep cleaning your car’s interior goes far beyond aesthetics. It is an investment in your health and your vehicle’s longevity .
- Health & Hygiene: Over time, your carpets and vents trap allergens, mold spores, and bacteria. A deep clean (especially steam cleaning) eliminates these pollutants, improving the air quality for you and your passengers .
- Preserve Resale Value: A pristine interior can significantly increase your car’s trade-in or resale value. Buyers are willing to pay a premium for a vehicle that looks and smells well-maintained .
- Prevent Premature Wear: Dirt particles are abrasive. When ground into fabric seats or leather, they act like sandpaper, speeding up wear and tear. Regular deep cleaning removes these grits, extending the life of your upholstery .
- Driving Pleasure: Let’s face it, sliding into a fresh, clean, and great-smelling cabin simply makes every drive more enjoyable .
What You’ll Need
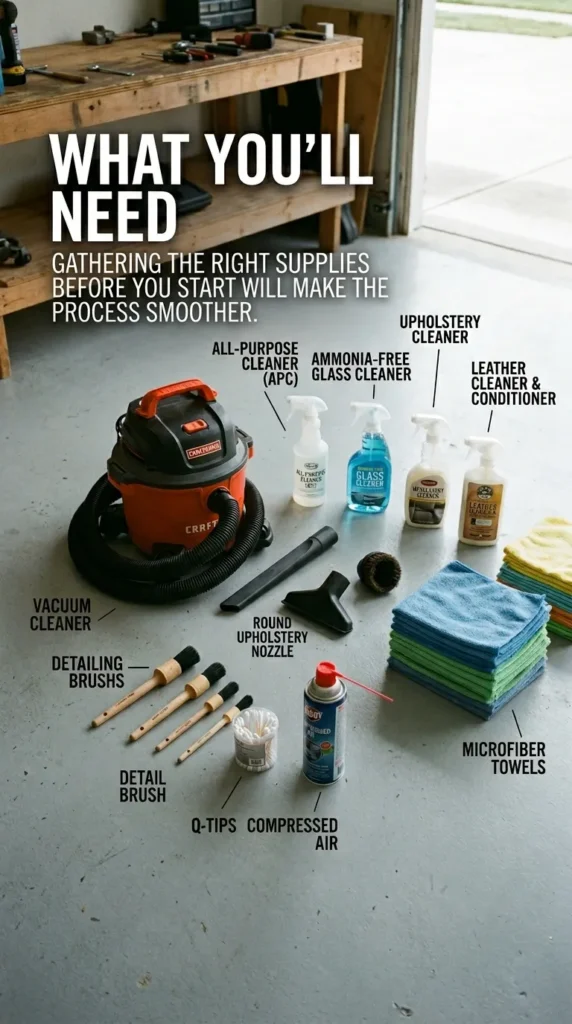
Gathering the right supplies before you start will make the process smoother. Here is a detailed list of essentials :
- Vacuum Cleaner: A wet/dry vac or a strong household vacuum with a hose.
- Attachments: Crevice tool (for gaps), brush attachment (for vents/dash), and upholstery tool (for seats).
- Microfiber Towels (10-15): These are non-abrasive and essential for streak-free cleaning. Pro tip: Use different colors for different tasks (e.g., blue for glass, green for dash) to avoid cross-contamination.
- Detailing Brushes: A set of soft bristle brushes (or an old toothbrush) for scrubbing cup holders, air vents, and stitching .
- All-Purpose Cleaner (APC): A safe, pH-balanced cleaner for plastic, vinyl, and general surfaces .
- Glass Cleaner: An ammonia-free formula to protect tinted windows .
- Upholstery Cleaner: For fabric seats and carpets (foam or liquid spray).
- Leather Cleaner & Conditioner: A two-step system or a combined product to clean and protect leather .
- Cotton Swabs (Q-tips): Perfect for cleaning tiny crevices around buttons and screens.
- Compressed Air (Optional): Great for blasting dust out of vents .
Step-by-Step Guide
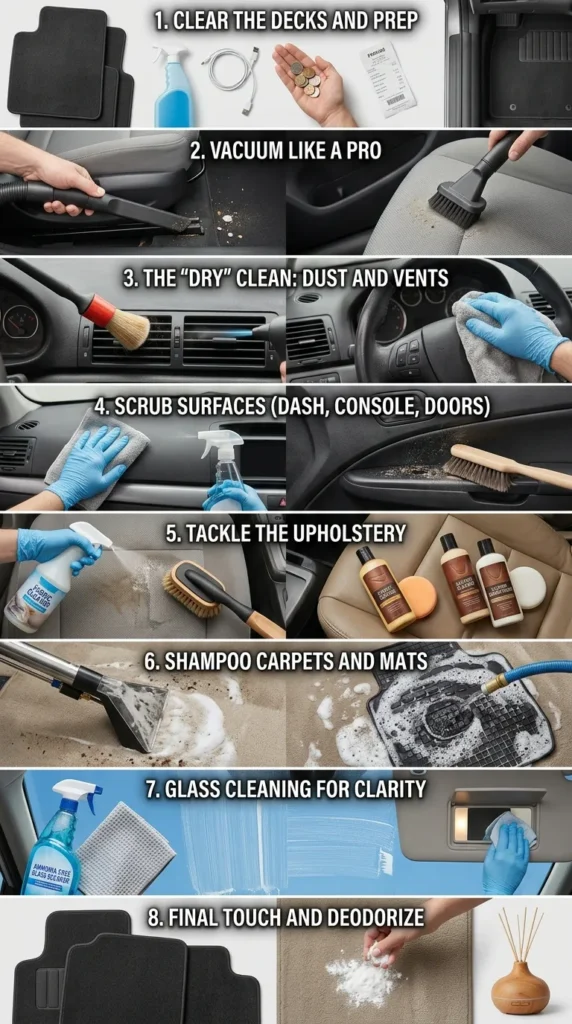
Follow this systematic approach to ensure no spot is missed. Work from the top down (headliner to floors) so dirt falls onto areas you haven’t cleaned yet .
1. Clear the Decks and Prep
Remove absolutely everything: floor mats, trash, phone chargers, coins in the cup holders, and items from the glove box and trunk. Take the floor mats out to be cleaned separately .
2. Vacuum Like a Pro
Start with the seats and carpets before wiping surfaces.
- Seats: Use the upholstery attachment. Lift the seat headrests and vacuum the bases.
- Carpets: Use slow, overlapping strokes. Press hard to allow the vacuum to pull dirt from deep within the fibers .
- Crevices: Use the crevice tool to run along the edges of the center console, the seat rails, and the door pockets. Move the seats forward and backward to access hidden spots .
3. The “Dry” Clean: Dust and Vents
Before using any liquids, use a brush attachment or compressed air to dust the dashboard, steering wheel, and air vents. For sticky vents, use a detailing brush or Q-tip dipped in cleaner to wipe the slats .
4. Scrub Surfaces (Dash, Console, Doors)
Spray your all-purpose cleaner or interior detailer onto a microfiber towel—never directly onto the surface or screens . Wipe down all hard surfaces. For textured plastic, use a soft brush to loosen the dirt, then wipe away with a towel .
5. Tackle the Upholstery
- Fabric Seats: Spray upholstery cleaner onto the fabric. Agitate the stain with a soft brush to work the cleaner into the fibers. Let it sit for the time specified on the label, then blot with a clean, damp microfiber towel to extract the dirt. For deep stains, a wet/dry vac or extractor is best .
- Leather Seats: Apply a dedicated leather cleaner with a damp microfiber. Wipe away the residue, then immediately apply a leather conditioner to keep the material soft and prevent cracking .
6. Shampoo Carpets and Mats
Treat the carpets the same way you treated fabric seats.
- Rubber Mats: Wash with soap and water, scrub, and rinse .
- Carpet Mats: Lay them flat, spray with cleaner, scrub, and rinse with a hose or pressure washer. Hang them to dry completely before putting them back in the car .
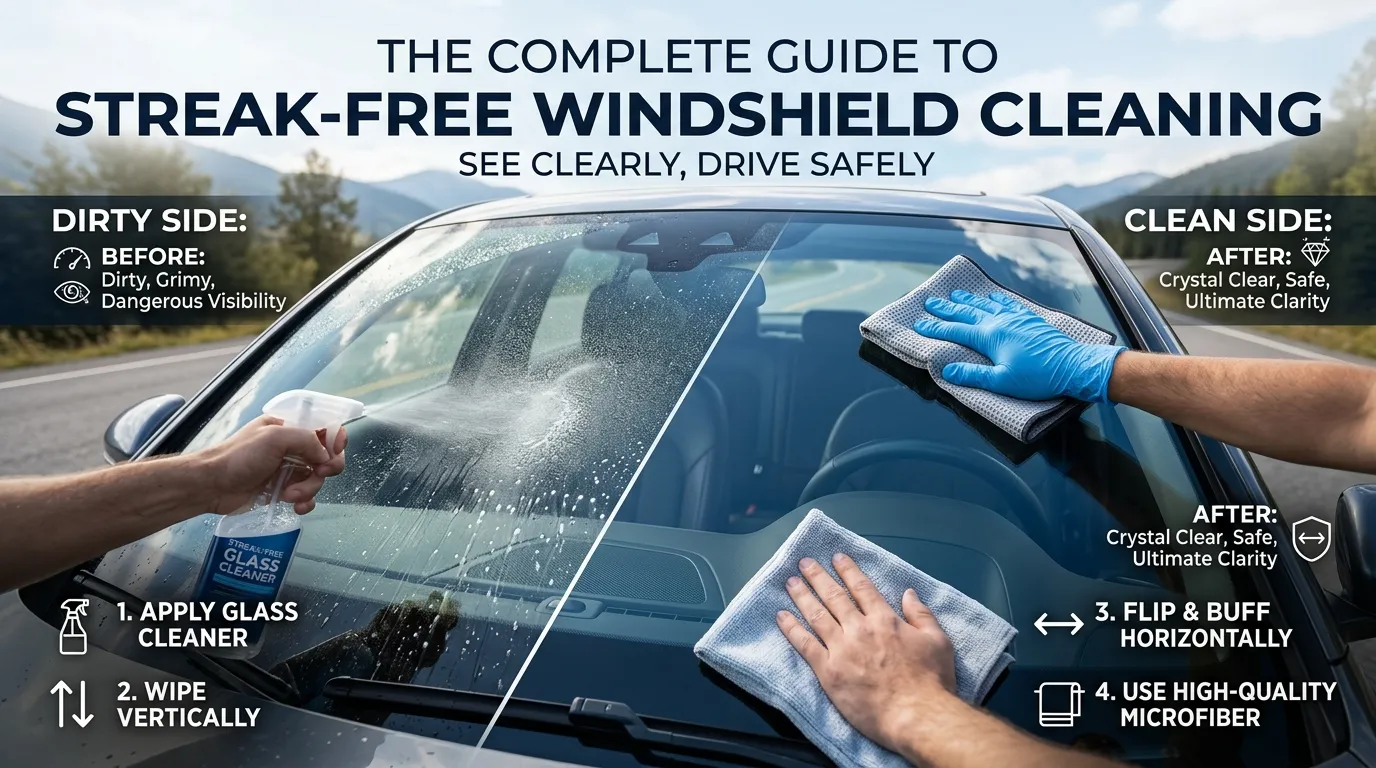
7. Glass Cleaning for Clarity
Use an ammonia-free glass cleaner sprayed onto a towel. Wipe the inside of the windshield, rear window, and side windows in a vertical motion on the first pass and horizontal on the second. This “cross-hatch” pattern helps you identify streaks . Don’t forget the sun visor mirror!
8. Final Touch and Deodorize
Once everything is dry, reinstall the mats and accessories. If lingering odors persist, sprinkle baking soda on the carpets, let it sit for an hour, and vacuum it up. Alternatively, install a wooden diffuser for a subtle, long-lasting fresh scent .
Cost Breakdown
One of the biggest questions is whether to DIY or go pro. Here’s what you can expect to spend .
| Service Level | Description | Estimated Cost (USD) |
|---|---|---|
| DIY Basic Deep Clean | Purchase of basic cleaners, microfiber towels, and brushes. You provide the labor and vacuum. | $30 – $60 |
| DIY Premium Detail | Purchase of specialized products (leather kits, extractor cleaners) and tools. | $70 – $150 |
| Professional (Sedan) | Full service: steam cleaning, shampooing, leather treatment, and odor removal. | $150 – $250 |
| Professional (SUV/Truck) | Larger interior requires more labor and product. | $200 – $400+ |
| Add-Ons | Pet hair removal, heavy stain treatment, ceramic coating on fabric. | +$50 – $100 |
Explanation:
- DIY is labor-intensive but cost-effective. It gives you control but requires time and physical effort.
- Professional detailing uses industrial-grade equipment (like hot water extractors) that pulls dirt out rather than pushing it in, often yielding superior results that are impossible to achieve with household tools .
Before and After
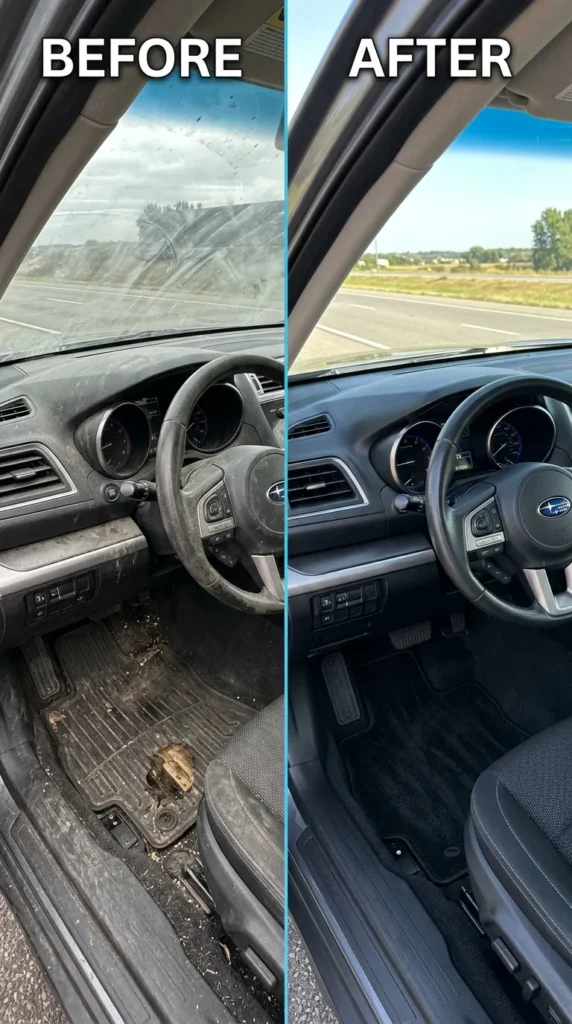
A proper deep clean transforms the driving experience.
- Before: You likely see cloudy windows that glare at night, a dusty dashboard that reflects on the windshield, and carpets matted down with dirt. There might be a faint, musty smell from spilled coffee or moisture.
- After: The glass is crystal clear. The dashboard has a rich, non-greasy depth to its color. Carpets are fluffy and visibly brighter. The cabin smells fresh and clean, not like artificial perfume. The overall sensation is one of “newness” and hygiene .
Product Recommendations
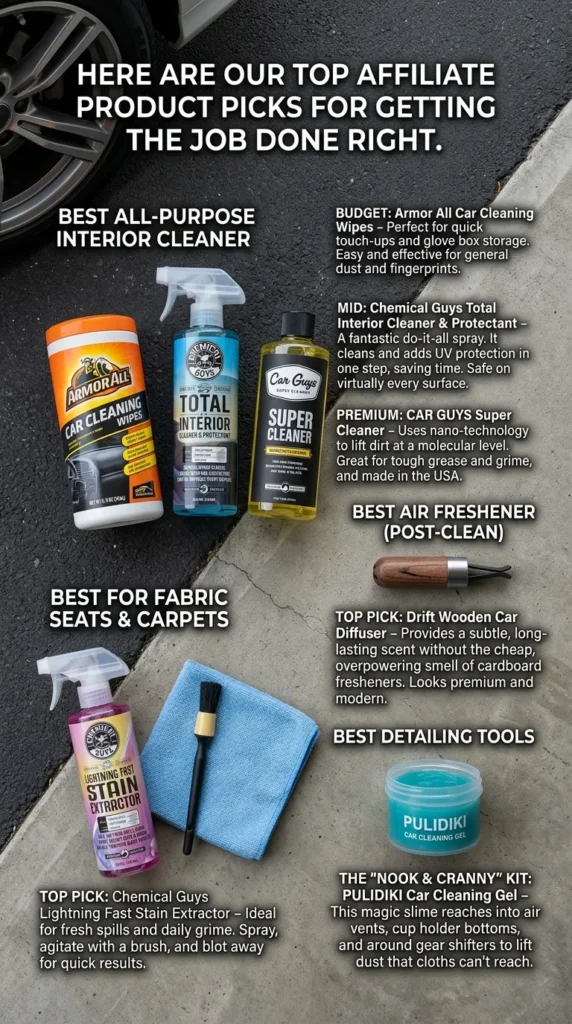
Here are our top affiliate product picks for getting the job done right .
Best All-Purpose Interior Cleaner
- Budget: Armor All Car Cleaning Wipes – Perfect for quick touch-ups and glove box storage. Easy and effective for general dust and fingerprints .
- Mid: Chemical Guys Total Interior Cleaner & Protectant – A fantastic do-it-all spray. It cleans and adds UV protection in one step, saving time. Safe on virtually every surface .
- Premium: CAR GUYS Super Cleaner – Uses nano-technology to lift dirt at a molecular level. Great for tough grease and grime, and made in the USA .
Best for Fabric Seats & Carpets
- Top Pick: Chemical Guys Lightning Fast Stain Extractor – Ideal for fresh spills and daily grime. Spray, agitate with a brush, and blot away for quick results .
Best Detailing Tools
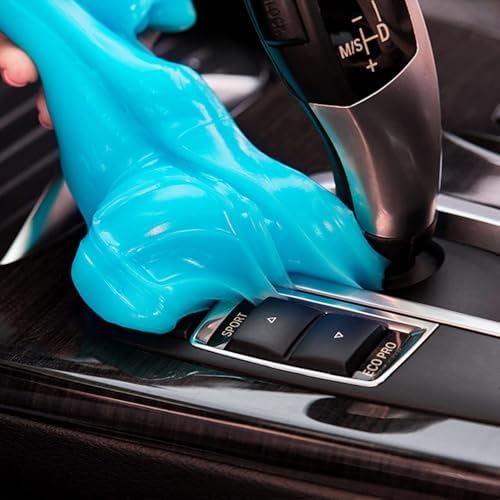
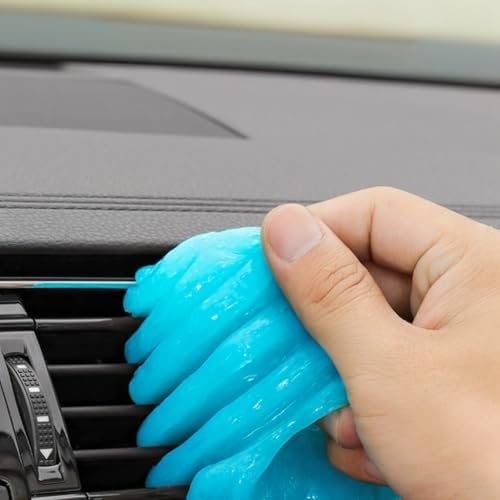
- The “Nook & Cranny” Kit: PULIDIKI Car Cleaning Gel – This magic slime reaches into air vents, cup holder bottoms, and around gear shifters to lift dust that cloths can’t reach .
Best Air Freshener (Post-Clean)
- Top Pick: Drift Wooden Car Diffuser – Provides a subtle, long-lasting scent without the cheap, overpowering smell of cardboard fresheners. Looks premium and modern .

Comparison Section: Cleaner & Protectant vs. Dedicated Products
One of the most common debates in car care is whether to use an all-in-one product or separate dedicated solutions.
Option A: All-in-One Cleaner & Protectant (e.g., Chemical Guys Total Interior)
- Pros: Incredibly convenient. Saves time because you don’t have to switch bottles. Usually leaves a nice, streak-free finish. Cost-effective for regular maintenance. Provides a layer of UV protection .
- Cons: The “jack of all trades, master of none.” The cleaning power might be weaker than a dedicated cleaner, and the protection layer won’t last as long as a dedicated dressing . Not ideal for heavily soiled interiors.
- Best For: Weekly upkeep and maintaining a car that is already in good condition.
Option B: Dedicated Cleaner + Separate Protectant/Dressing (e.g., P&S Xpress Interior Cleaner + 303 Protectant)
- Pros: Maximum performance. You get a strong cleaner that strips dirt effectively and a protectant that offers long-lasting UV and wear resistance. You have more control over the final look (matte vs. shiny) .
- Cons: More expensive upfront. Takes more time to apply two products. Requires more storage space for bottles.
- Best For: Deep cleaning sessions, detailing enthusiasts, and preparing a car for sale.
Verdict: For most people, a high-quality All-in-One is the best choice for ease and speed. If you are a perfectionist or dealing with heavy neglect, go with Dedicated products.
Troubleshooting
| Problem | Likely Cause | The Fix |
|---|---|---|
| Streaks on Windows | Using too much product, or cleaning in direct sun. | Wipe with a dry microfiber, then buff with a clean, dry towel. Use less product next time and clean in the shade . |
| Greasy Dashboard | Using a protectant not properly buffed, or using the wrong product. | Wipe down with a damp microfiber towel dampened with a 50/50 water and isopropyl alcohol mix to remove the oil. Reapply sparingly and buff to a matte finish. |
| Stubborn Stains on Seats | Stain has set deep into the fibers. | Use a stiff brush to agitate the cleaner deeply, then use a wet/dry vac to extract the liquid, not just blot it. You may need a dedicated spot cleaner . |
| Musty Smell Returns | Moisture trapped in carpets or a dirty cabin air filter. | Ensure carpets are 100% dry before closing doors. Replace the cabin air filter (located behind the glove box) . |
| Pet Hair Everywhere | Static cling and barbed hair structure. | Use a rubber detailing brush or a pumice stone. Dampening the upholstery slightly can also help loosen hair for the vacuum. |
Time Required & Difficulty Level
- Total Time: 2.5 to 4 hours.
- Preparation & Vacuuming: 45 minutes.
- Surface Cleaning: 30 minutes.
- Upholstery & Carpet Scrubbing: 1–1.5 hours.
- Glass & Finishing: 30 minutes.
- Difficulty Level: Easy to Moderate.
- Easy: Wiping surfaces and vacuuming.
- Moderate: Shampooing seats and carpets without over-wetting them (which can lead to mold).
Pro Tips
- DO use the “Two Towel Method.” Use one damp towel to apply the cleaner and spread the dirt, and a second dry towel to buff it dry immediately. This prevents streaks .
- DON’T spray cleaners directly onto electronic screens or buttons. Liquid can seep inside and cause damage. Always spray the towel first .
- DO test any new cleaner on a hidden spot (like under a seat) to check for colorfastness or damage .
- DON’T use dish soap on your interior. It is too harsh and will strip protective oils from vinyl and leather, causing them to dry out and crack .
- DO leave the doors open for 30 minutes after cleaning to let any residual moisture and fumes air out .
Best Picks
If you only buy three products, make them these:
- Best All-Rounder: Chemical Guys Total Interior Cleaner & Protectant – Simplifies the entire process .
- Best for Details: PULIDIKI Car Cleaning Gel – Essential for getting dust out of vents and crevices effortlessly .
- Best for Smell: Drift Wooden Car Diffuser – Keeps the car smelling fresh for weeks after your clean .
Use Cases
- The Daily Commuter (Monthly Maintenance): Use an All-in-One spray and a pack of wipes. Focus on high-touch areas and a 10-minute vacuum.
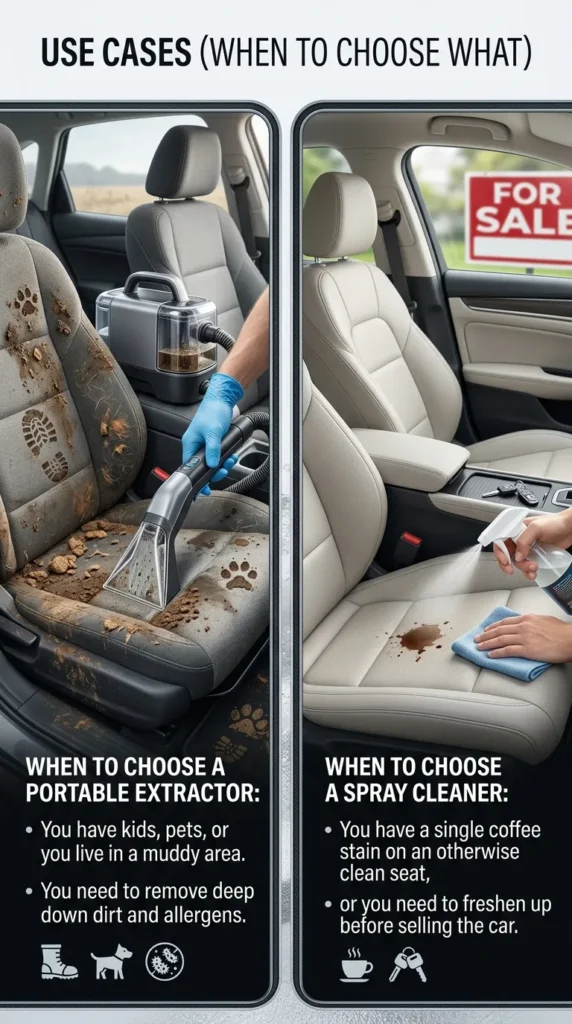
- The Family Hauler (Quarterly Deep Clean): Dedicate a full afternoon. Use dedicated upholstery cleaner for seats, extractor tools for carpets, and deep clean the mats. This tackles goldfish crumbs and juice spills.
- Selling Your Car (One-Time Detail): Go all out. Consider buying a clay bar for the exterior, a leather conditioner for the interior, and a steam cleaner for the carpets. Presentation is everything for resale value .
Common Mistakes to Avoid
- Using the Same Towel for Everything: This just spreads dirt. Use one towel for cleaner application, one for buffing, and a separate one for glass .
- Over-Wetting Carpets: If you soak the carpet padding, it will take days to dry and may develop mildew. Use cleaners sparingly and extract excess moisture .
- Skipping the UV Protection: Sunlight destroys interiors. Fading dashboards and cracked leather are irreversible. Always use a product with UV inhibitors .
- Ignoring the Cabin Air Filter: You can clean the entire car, but if your cabin air filter is full of leaves and mold, the air will still smell bad. Replace it annually .
Safety Notes
- Electrical Components: Be extremely cautious when cleaning around the steering wheel column, radio, and power seat controls. Excess moisture can cause short circuits.
- Tinted Windows: Never use household glass cleaners containing ammonia. Ammonia will discolor and peel window tint films. Always check the label for “safe for tinted windows” .
- Ventilation: If using strong chemical cleaners or steam, ensure the car is well-ventilated (doors open) to avoid inhaling concentrated fumes .
- Slippery Pedals: After cleaning rubber floor mats or pedals, ensure they are completely dry before driving to prevent your foot from slipping off the brake or gas.
FAQs
1. How often should I deep clean my car interior?
You should perform a deep clean every 3 to 6 months. If you have kids, pets, or eat in your car regularly, aim for every 3 months .
2. Can I use household cleaning products like bleach or Windex?
No. Avoid household cleaners. They contain harsh chemicals that can discolor upholstery, dry out leather, and damage tinted windows .
3. What’s the best way to get rid of smoke smell?
You need to clean all surfaces (including the headliner) and use an enzymatic odor eliminator or an ozone machine (professionally). Replacing the cabin air filter is also critical .
4. How do I clean leather car seats without cracking them?
Use a pH-balanced leather cleaner first to remove dirt from pores. Follow up immediately with a leather conditioner to replenish natural oils. Avoid harsh all-purpose cleaners .
5. Is it safe to pressure wash car floor mats?
Rubber mats: Yes. Carpet mats: Yes, but use a wide fan tip and keep distance. Ensure they are fully dry before putting them back to prevent mold .
6. How do I clean a car headliner without it sagging?
The headliner is delicate. Use an upholstery cleaner with very low moisture. Spray onto a brush or towel, not directly, and gently dab—do not scrub aggressively, as this can cause the fabric to detach.
7. What order should I clean my car in?
Always work from the top down (headliner -> dash -> seats -> floors) and from the inside out. This ensures dirt falls onto areas you haven’t cleaned yet .
8. Can I use a steam cleaner on all interior parts?
Steam is great for glass and hard plastic, but be cautious around electronics. On fabric, it sanitizes well, but you must extract the water to prevent mold.
9. How do I remove scratches from plastic trim?
For light scratches, use a heat gun carefully (risk of melting) or a dedicated plastic restoration product. For deep scratches, trim repair kits or replacement is needed.
10. Why does my car smell musty after cleaning?
This usually means the carpets or upholstery didn’t dry fully, or moisture got into the ventilation system. Ensure proper drying time and run the AC on fresh air mode to dry the coils.
Final Thought
One of the most rewarding DIY projects you can take on is deep cleaning your car’s interior. It is an alchemy that changes the place where you probably spend hundreds of hours a year from a stressed, messy locale to a sanctuary of purity and stillness. It takes some elbow grease and the right tools, but most owners will find that the sense of accomplishment — not to mention a little money saved by avoiding a professional detailer — is worth it.
Keep in mind, the point is not to get it perfect on your first attempt. It’s about consistent care. Not only are you following this guide to clean your car, but also protect your investment and improve your everyday driving experience. So get your supplies, turn on some music and give your ride the attention it deserves.


Leave a Reply