There is just something so luxurious about entering how to remove pet hair from car seats. The smell, the texture, the comfort it transforms a drive into a thing. But that luxury has a responsibility associated with it. Life arrives spilled coffee, stained jeans and body oils accumulating, a burning sun. These factors join together to convert that showroom gloss into a dull, smeary, cracked and well-worn surface over time. Car owners often make the mistake of picking out household cleaners or all-purpose wipes, inadvertently progressing its damage. If you are looking for the perfect and hazardous free cleaning method for car leather seats, then you are at the right place. This in-depth guide will take you from the necessary tools to a step-by-step tutorial for maintaining that high-end ambience for many years to come.
Quick Answer
Cleaning leather car seats: Vacuum to remove debris, apply pH-balanced leather cleaner with microfiber cloth or soft brush, repeat if necessary, and finish using high-quality leather conditioner to prevent cracking. Wipe every 2-3 months and apply conditioner every 6. Do not use household cleaners, bleach or ammonia ever.
Why It Matters (The Benefits)
Taking the time to properly care for your leather interior isn’t just about vanity; it is a crucial aspect of vehicle ownership that pays dividends in the long run.
- Preserves Resale Value: A clean and well-maintained interior with supple, un-cracked leather increases your car’s trade-in or resale value by an enormous percentage. A clean cabin earns a vehicle an assumption of a well-cared-for heart.
- Prevents Expensive Damage:Dirt and oils are abrasive. When you slide over a dirty seat, thanks to how leather can feel like as it absorbs particles, you are rubbing those things right into the leather and causing excessive wear. Cleaning on a regular basis helps to remove these grit particles before damage can be done.
- Enhances Comfort and Luxury: Clean, conditioned leather feels soft and luxurious. Dry, cracked leather is uncomfortable and looks neglected.
- Health and Hygiene: Leather pores can trap allergens, bacteria, and odors. Deep cleaning removes these contaminants, improving the air quality inside your vehicle .
What You’ll Need (Tools + Products)
Before you start, gather your supplies. Using the correct tools is half the battle won.
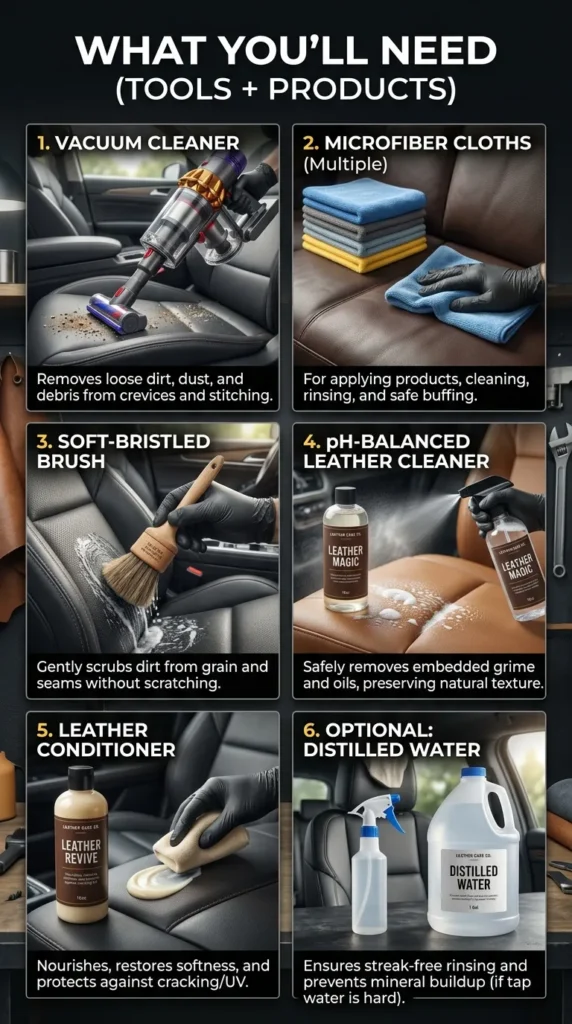
- Vacuum Cleaner: A wet/dry vac or a standard household vacuum with a soft brush attachment and crevice tool to remove loose dirt from seams .
- Microfiber Cloths (Multiple): You will need several. They are non-abrasive and highly absorbent. Avoid terry cloth or paper towels .
- Soft-Bristled Brush: A detailing brush or a soft toothbrush specifically for agitating the cleaner in grain patterns and seams without scratching .
- pH-Balanced Leather Cleaner: Essential for safe cleaning. (Affiliate Opportunity: Chemical Guys Leather Cleaner Spray / Meguiar’s Gold Class) .
- Leather Conditioner: To replenish natural oils and provide UV protection. (Affiliate Opportunity: Chemical Guys Leather Conditioner / Leather Honey Conditioner) .
- Optional: Distilled Water: For diluting cleaners if necessary and for final wipe-downs .
Step-by-Step Guide (How-To)
Follow these steps meticulously to achieve professional-grade results.
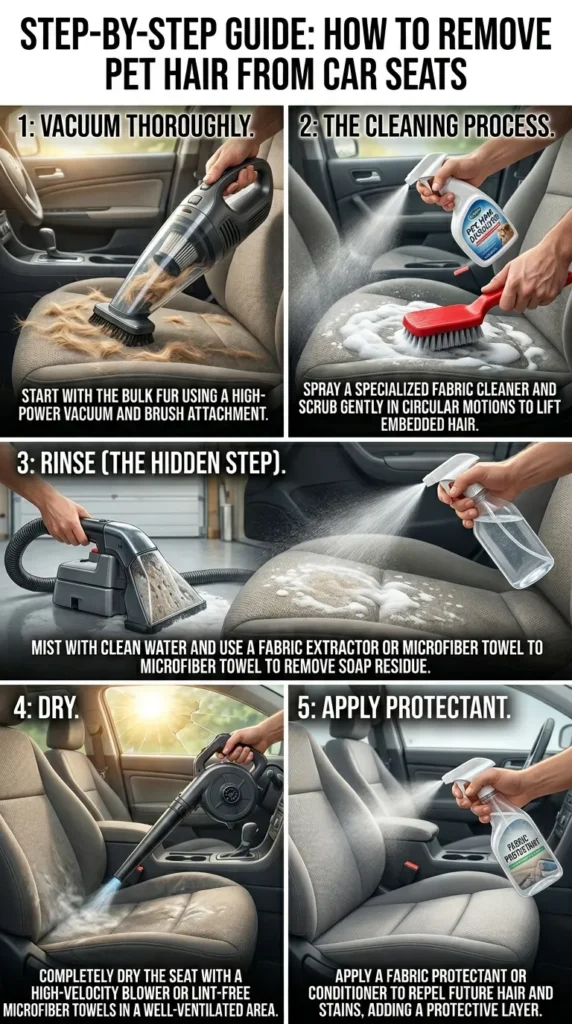
Step 1: Vacuum Thoroughly
Begin by taking out the floor mats and vacuuming those separately as well. Take the soft brush attachment of your vacuum cleaner and run it gently over all the surfaces of the seats, especially the crevices, seams and bolsters where crumbs and dirt have a tendency to hide. This avoids grinding dirt into the leather in the wet cleaning stage.
Step 2: The Cleaning Process
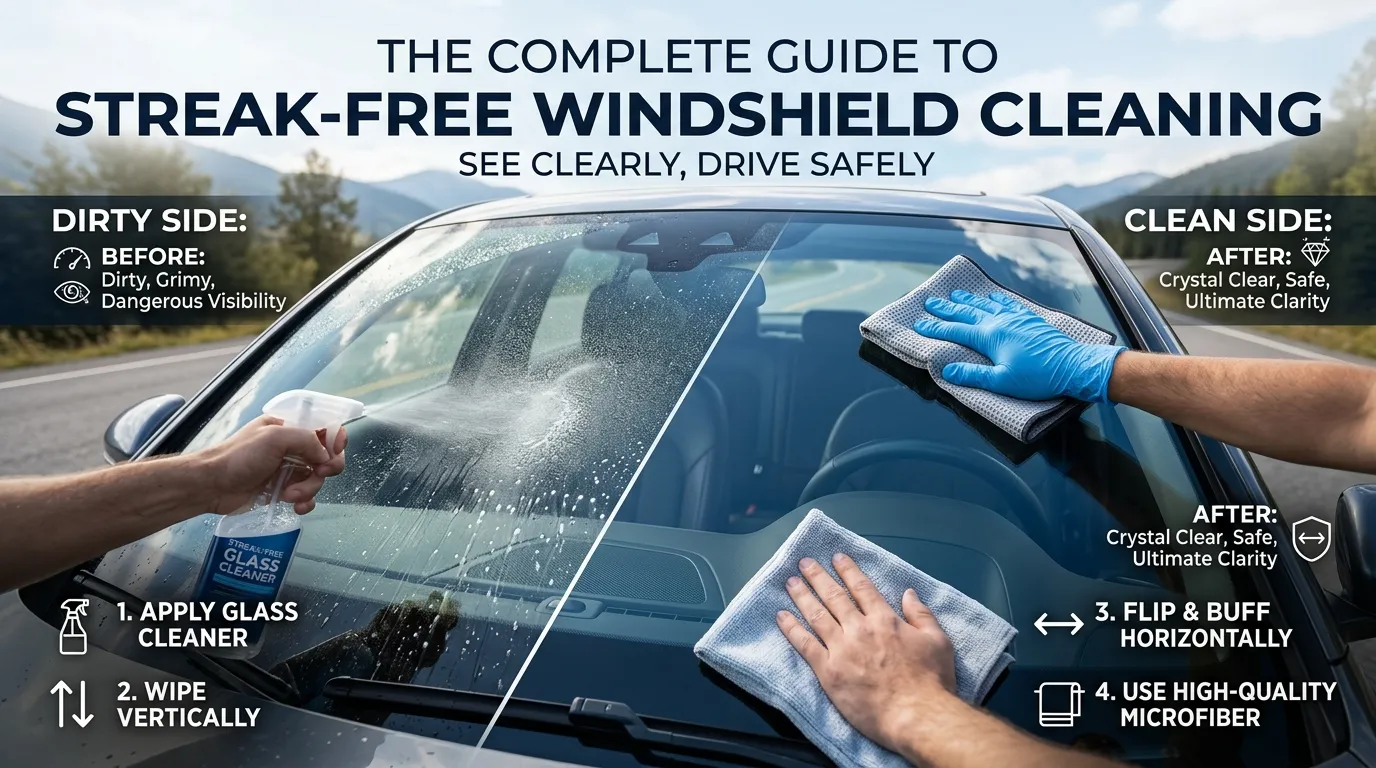
Never spray cleaner directly onto the seat if you can avoid it. Spray your chosen pH-balanced leather cleaner onto a folded microfiber cloth or your soft brush. This prevents overspray on plastic components and windows .
- Apply: Wipe the seat in small sections, applying the cleaner.
- Agitate:Use the soft brush in a circular motion to pull dirt from the grain of the leather. You should notice the solution lathering a bit as it emulsifies any oils and grime.
- Wipe Away: Immediately wipe away the loosened dirt and foam with a clean, damp microfiber cloth. Don’t let the cleaner dry on the surface.
Step 3: Rinse (The Hidden Step)
Dampen a clean microfiber cloth with distilled water, wring it out well (quite damp but not wet), and use the towel to wipe down the seats. This “rinsing” step eliminates any leftover cleaner that might lure more dirt over time or cause the leather to dry out if allowed to remain behind.
Step 4: Dry
Using a fresh, dry microfiber cloth, thoroughly dry the seats. Ensure no moisture is left in the seams or on the surface .
Step 5: Condition
Just like your skin, leather needs moisture. Apply a small amount of leather conditioner to another clean microfiber cloth.
- Apply: Work the conditioner into the leather using circular motions. Let it sit for 10-15 minutes to allow the leather to absorb it .
- Buff: Finally, wipe away any excess conditioner with a clean, dry microfiber cloth. It leaves a protective, non-greasy finish that is resistant to UV rays and future staining.


Cost Breakdown
Cleaning your leather seats yourself is far more economical than professional detailing.
| Item | Budget Option | Mid-Range Option | Premium Option |
|---|---|---|---|
| Leather Cleaner | $5 – $10 (Armor All) | $10 – $20 (Meguiar’s) | $20 – $30 (Chemical Guys) |
| Leather Conditioner | $5 – $10 (Turtle Wax) | $10 – $25 (Meguiar’s) | $25 – $40 (Leather Honey) |
| Microfiber Cloths (Pack) | $5 – $10 (Generic) | $10 – $15 (Kirkland) | $15+ (Professional Grade) |
| Soft Bristle Brush | $3 – $7 (Basic) | $8 – $12 (Detail Brush) | $15+ (Ergonomic Kit) |
| Total Estimated Cost | $18 – $37 | $38 – $72 | $75 – $150+ |
| Professional Detailing | $50 – $100 (Interior Spruce) | $100 – $250 (Full Detail) | $250 – $500+ (Concours Detail) |
As the table shows, for the price of a single professional detail, you can buy premium products that will last for dozens of cleaning sessions .
Before and After
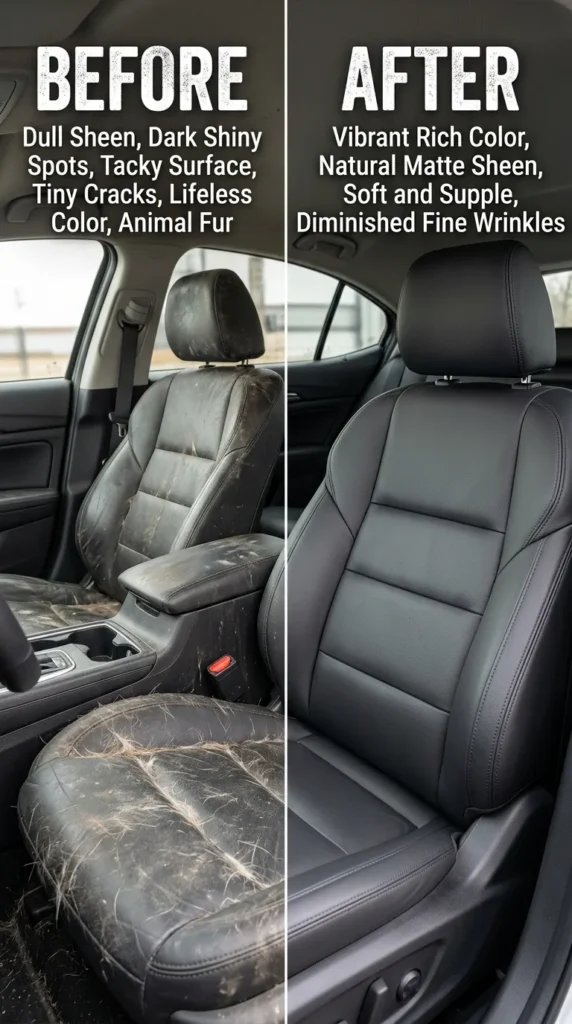
Before: Imagine a dully, greyish sheen on the seat of your car. The bolsters have dark, shiny spots where body oils have pooled. The surface is a little tacky or waxy, and tiny cracks are developing along the seams. The color has a faded lifelessness.
After: After going through the steps above, the leather return to its original colour, rich and vibrant. The surface has a sheen, natural and matte—not greasy. Soft and supple leather that feels nice to the touch The dirt and grime that previously obscured its beauty is removed, and the conditioner has plumped up the fibers to diminish fine wrinkles. It looks like a new car and feels like one too.
Product Recommendations (Budget)
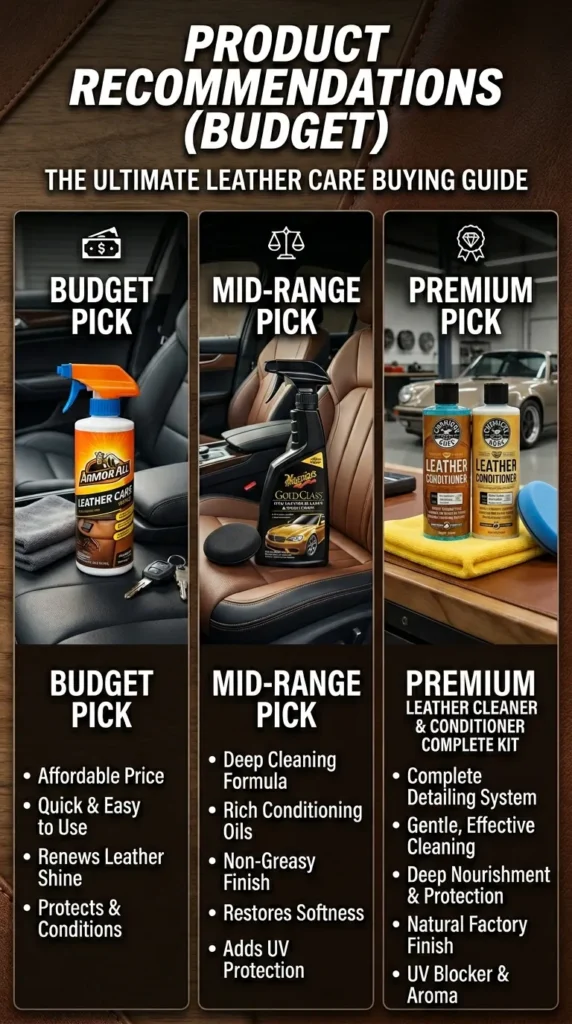
- Budget Pick: Armor All Leather Care Spray
- Best For:Regular maintenance and light cleaning. It’s inexpensive and widely available, and provides adequate hydration benefits as well as some protection from drying and UV exposure. A great entry-level product.
- Mid-Range Pick: Meguiar’s Gold Class Rich Leather Cleaner & Conditioner
- Best For: Convenience. This all-in-one formulation cleans and conditions in one effort to save time, while aloe and conditioners maintain leather softness and protect against fading.
- Premium Pick: Chemical Guys Leather Cleaner & Conditioner Complete Kit
- Best For: Enthusiasts seeking professional results. This two-part system comes with a pH-balanced cleaner, a Vitamin E-rich conditioner, and applicators. It’s meant to remove heavy soil while reinstating a factory-like finish.
Comparison Section: Cleaner & Conditioner (2-in-1) vs. Separate Products
Option A: 2-in-1 Cleaner & Conditioner
- How it works: These products attempt to clean and moisturize in a single application.
- Pros: Fast, easy, and convenient. Ideal for quick touch-ups and upkeep when the seats aren’t heavily soiled. Can save money by not having to buy two products.
- Cons: Often does neither job perfectly. The conditioner’s ability to penetrate through muck can be limited when the seats are significantly dirty. It may also leave a residue.
Option B: Dedicated Cleaner and Separate Conditioner
- How it works: A two-step process where the cleaner preps the surface by removing all impurities, and the conditioner is applied afterward to nourish and protect.
- Pros: Delivers the most effective clean and superior protection. This allows the conditioner to penetrate solely into the leather pores while also offering excellent UV protection and softness. Good for dirty or neglected seats.
- Cons: Takes more time and requires purchasing two products, increasing the initial cost.
The Verdict: For most people, a 2-in-1 is great for maintenance. However, at least once or twice a year, or if your seats are visibly dirty, invest the time and use the separate two-step system for a true deep clean.
Troubleshooting
| Problem | Likely Cause | The Fix |
|---|---|---|
| Seats feel sticky after cleaning | Using too much cleaner or not wiping away residue properly. | Dampen a microfiber cloth with distilled water and thoroughly wipe down the seat to remove all chemical residue. Dry immediately. |
| White, chalky residue appears | Using a conditioner with heavy waxes or over-conditioning. | Buff the area vigorously with a dry microfiber cloth. If that fails, a very mild cleaner dilution can be used to remove excess conditioner, then re-buff. |
| Leather looks dull or blotchy | Dirt trapped in the grain or uneven application of conditioner. | Re-clean the area with a soft brush to agitate the grain, wipe clean, and reapply conditioner evenly. |
| Stubborn stains (ink, grease) | Using the wrong product or technique. | Don’t rub! For grease, use a dedicated degreaser. For ink, consult a professional. Household remedies can ruin the leather. |
Time Required & Difficulty Level
- Time Required: 30 to 60 minutes for a standard passenger car with front and rear leather seats .
- Difficulty Level: Easy. No mechanical skill is required, only attention to detail and patience. It is a perfect task for a Saturday afternoon.
Pro Tips
- DO: Test any new cleaner on a hidden area (like the bottom edge of the seat) to check for colorfastness .
- DO: Clean spills immediately. The longer a spill sits, the harder it is to remove .
- DO: Park in the shade or use a sunshade. UV rays are the number one enemy of leather, causing fading and cracking .
- DON’T: Ever use household cleaners, bleach, ammonia, or furniture polish. These contain harsh chemicals that strip the leather’s protective coating and dry it out .
- DON’T: Use abrasive tools like stiff scrub brushes or magic erasers, which will scratch and remove the finish .
Best Picks

- Best Overall System: Chemical Guys Leather Cleaner & Conditioner Kit It offers a fully professional grade two-step process that gets optimum results from all grades of leather.
- Best Value All-in-One:Meguiar’s Gold Class Rich Leather Cleaner & Conditioner If you want to maintain your ride without breaking the bank, it provides great cleaning and protection in a convenient, affordable, and easy-to-use formula.
- Best Budget Wipe: Armor All Leather Care Wipes. Great to have on hand in the glove box for touching up while traveling. They’re very good for spills and dusting but are no substitute for a deep clean.
Use Cases
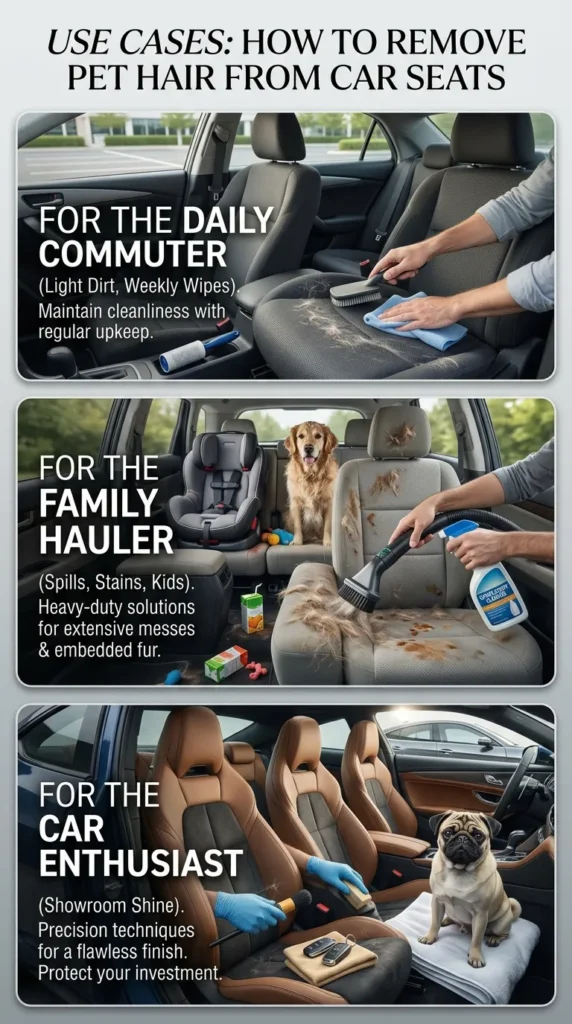
- For the Daily Commuter (Light Dirt, Weekly Wipes): Choose Armor All Leather Wipes. They are quick, easy to store, and perfect for a once-a-week dusting and light cleaning to prevent buildup .
- For the Family Hauler (Spills, Stains, Kids): Choose a strong dedicated leather cleaner like Turtle Wax Luxe Leather Cleaner for tough stains, followed by a separate heavy-duty conditioner like Leather Honey to protect against future spills and wear .
- For the Car Enthusiast (Showroom Shine): Choose the Chemical Guys Complete Leather Kit. The two-step process ensures the leather is perfectly prepped and nourished for a flawless, deep gloss that looks ready for a car show .
Common Mistakes to Avoid
- Over-wetting the Leather: Soaking leather seats can cause water spots, damage the foam underneath, or lead to mold. Always use a damp, not soaking, cloth .
- Skipping the Vacuum: Cleaning without vacuuming first is like sanding wood without dusting it off—you’re just grinding the dirt in.
- Using the Wrong Cloth: Paper towels and colored rags can scratch or transfer dye. Stick to high-quality microfiber .
- Forgetting the Conditioner: Cleaning strips oils. If you clean without conditioning, you leave the leather dry and vulnerable to cracking .
Safety Notes
- Ventilation: When using chemical cleaners, ensure your garage is well-ventilated or work with the car doors open to avoid inhaling fumes .
- Slippery Pedals: Just don’t spray cleaner or conditioner on the foot pedals or steering wheel, as they tend to get slippery. Use a suitable cleaner to clean them separately.
- Heated Seats:If you have heated seats, let the seats dry thoroughly before turning your heaters on. Moisture and heating are not a friend as they can ruin both the leather and the heating elements.
FAQ
1. How often should I clean my leather car seats?
For general maintenance, a deep clean and condition every 2 to 3 months is sufficient. A quick wipe-down with a leather-safe wipe can be done weekly .
2. Can I use baby wipes to clean leather car seats?
It’s not recommended. Baby wipes contain lotions, alcohols, and detergents that can strip the leather’s protective coating and leave a residue that attracts more dirt.
3. Is it better to clean leather with a cloth or a brush?
Both. Use a soft brush to gently agitate and lift dirt from the grain pattern. Use a microfiber cloth to apply products and wipe away the residue .
4. Do I really need to use a leather conditioner?
Absolutely. Conditioner replenishes the natural oils lost during cleaning and everyday use, keeping the leather soft, flexible, and resistant to cracking .
5. Can I clean leather seats with just soap and water?
In a pinch, a damp cloth can remove dust, but for a real clean, you need a pH-balanced cleaner. Dish soap or laundry detergent is too harsh and will dry out the leather .
6. What is the best thing to clean leather car seats with?
The best thing is a dedicated, pH-balanced leather cleaner from a reputable brand like Meguiar’s, Chemical Guys, or Griot’s Garage .
7. How do you get deep dirt out of leather seats?
Use a vacuum with a crevice tool first. Then, apply a leather cleaner and agitate it with a soft-bristled brush to lift the deep dirt from the grain before wiping it away .
8. Why do my leather seats look dull?
Dullness is usually caused by a buildup of body oils and dirt, or by using a conditioner that has left a hazy residue. A deep cleaning followed by proper buffing of conditioner usually fixes this.
9. Can I use vinegar to clean leather car seats?
No. Vinegar is an acid and can be extremely damaging to leather, drying it out and potentially eating away at the finish.
10. How do I get the “new car smell” back?
Cleaning and conditioning the leather will restore its natural scent. For lingering odors in the fabric or carpet, use an enzymatic cleaner or sprinkle baking soda overnight, then vacuum .
Final Thought
Your car is probably one of the most expensive purchases you’ll ever make and it’s where you spend all your time. Discovering how to clean leather car seats the right way is an easy, fulfilling skill that preserves that investment and enhances your daily driving experience. It doesn’t need pricey tools or hours of knuckle-busting labor — only the proper information, a smidgen of patience and a dedication to frequent maintenance. By following the steps in this guide, you can make sure every time you open your car door, you’re met with an interior that looks, feels and smells as luxurious as it did when new.


Leave a Reply